

- How the Alpaca connection works, and why paper and live connect separately
- What you need before you start
- How to accept the disclosures and authorize over OAuth
- How to verify equity, buying power, positions, and orders after connecting
- What the margin toggle changes about what your agents can spend
- How orders behave, how to troubleshoot, and how to disconnect
How the Alpaca Connection Works
Scalar Field connects to Alpaca over OAuth. You log in on Alpaca’s own site, and Alpaca returns a scoped authorization code that Scalar Field exchanges for a token on the server. Your Alpaca credentials are never shared with or stored by Scalar Field. Two things this flow does not involve are worth stating plainly, because Alpaca is often integrated the other way around. There are no API keys to copy — you never open Alpaca’s dashboard to generate a key pair or paste a secret anywhere. And there is no browser extension to install, unlike the Robinhood connection. It is a login in a popup window, and nothing else.Paper or Live: Which to Connect
Both, eventually. They appear as two separate cards, link through two separate handshakes, and get their own portfolio pages. Connecting one has no effect on the other, and disconnecting one leaves the other running.
The sensible order is paper first, live once the strategy has earned it. Paper fills are simulated, so buying power, fill prices, and performance can differ from live conditions — the paper disclosure says so explicitly. Treat paper as a correctness check on your agent’s behavior, not as a forecast of its returns.
Before You Start
There is no desktop-only restriction and no supported-browser list here. Because nothing depends on an extension, the popup flow works in any modern browser, and the same-tab fallback covers the case where popups are blocked entirely.
Step 1: Open Your Portfolio
Sign in to Scalar Field and click Portfolio in the left sidebar, or go directly toscalarfield.io/portfolio.
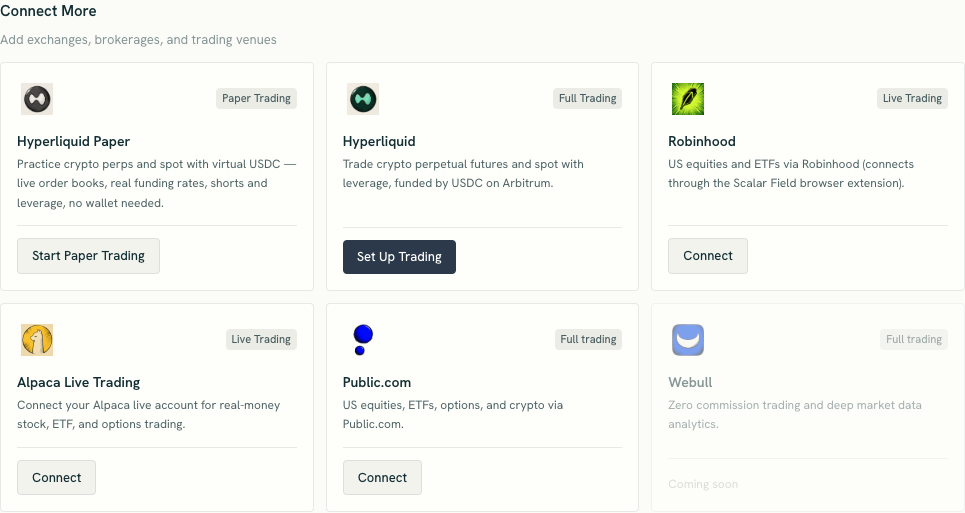
Scroll to the Connect More section, headed “Add exchanges, brokerages, and trading venues.” Every available venue lives here.
Step 2: Click Connect on the Alpaca Card
You will see two Alpaca cards, each with its own Connect button:- Alpaca Paper Trading, described as “Practice trading with a paper account — no real money at risk,” carrying a Paper Trading badge.
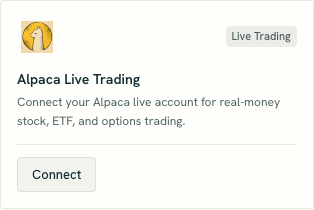
- Alpaca Live Trading, described as “Connect your Alpaca live account for real-money stock, ETF, and options trading,” carrying a Live Trading badge.
Step 3: Review and Accept the Disclosures
The modal is headed Alpaca paper trading or Alpaca live trading, with the subtitle “Review and acknowledge before connecting your Alpaca paper account” or “…your Alpaca live brokerage account.” Under a Disclosures label, it explains what you are about to authorize.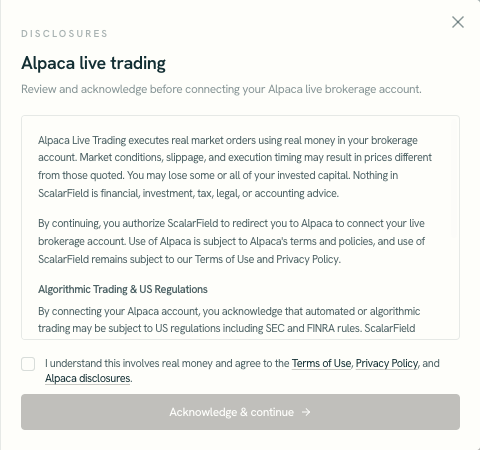 The disclosures sit in a single scrollable panel, and only the first two are visible at rest. Scroll the panel to read the rest — on the live modal, the Risk of Loss section is below the fold.
Both modes carry the same two core disclosures:
The disclosures sit in a single scrollable panel, and only the first two are visible at rest. Scroll the panel to read the rest — on the live modal, the Risk of Loss section is below the fold.
Both modes carry the same two core disclosures:
Each mode then adds its own:
Tick the consent box, which differs by mode — paper reads “I acknowledge this is paper trading and agree to the Terms of Use, Privacy Policy, and Alpaca disclosures,” and live reads “I understand this involves real money and agree to the Terms of Use, Privacy Policy, and Alpaca disclosures.” The Acknowledge & continue button stays disabled until the box is ticked.
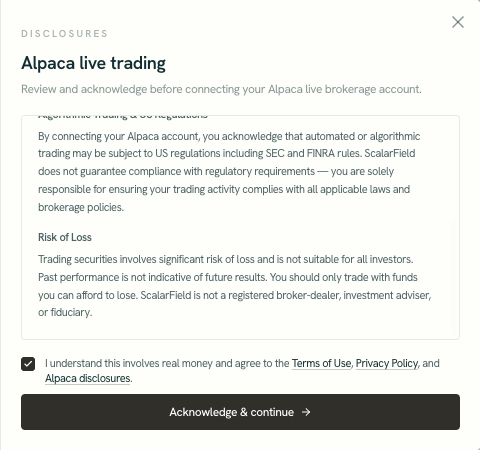 Click Acknowledge & continue. The button switches to Connecting… and the modal locks itself while the handshake runs, so you cannot dismiss it mid-flight.
Step 4: Authorize on Alpaca
A popup opens on Alpaca’s own site with their login screen. Sign in, complete any two-factor step, and approve the authorization request. All of this happens on Alpaca’s domain. Scalar Field never sees the login form; the only thing it receives back is a short-lived authorization code. If your browser blocked the popup, Scalar Field detects it and redirects the current tab to the same authorization page instead. The flow is identical — it just runs full-page, and you are returned to the page you started from when it finishes. A full-page redirect here is not a bug.Step 5: Let the Connection Finish
After you approve, the popup lands on the Scalar Field callback page, which reads “Connecting your Alpaca account…” while the server exchanges the code for a token. On success it shows “Alpaca Paper connected!” or “Alpaca Live connected!” with the note “This window will close automatically,” then closes itself after about a second. If Alpaca authorized both accounts in the same handshake, the message reads “Alpaca Paper and Live connected!” instead. The page you started from picks up the result on its own. Scalar Field signals the original tab directly, watches for the popup to close, and re-checks the account status whenever the tab regains focus — so the disclosures modal closes itself and the card flips to connected without a refresh.Step 6: Verify Your Alpaca Portfolio
Your account now appears under Your Venues on the portfolio page. Click it, or go toscalarfield.io/portfolio/alpaca-paper or scalarfield.io/portfolio/alpaca-live.
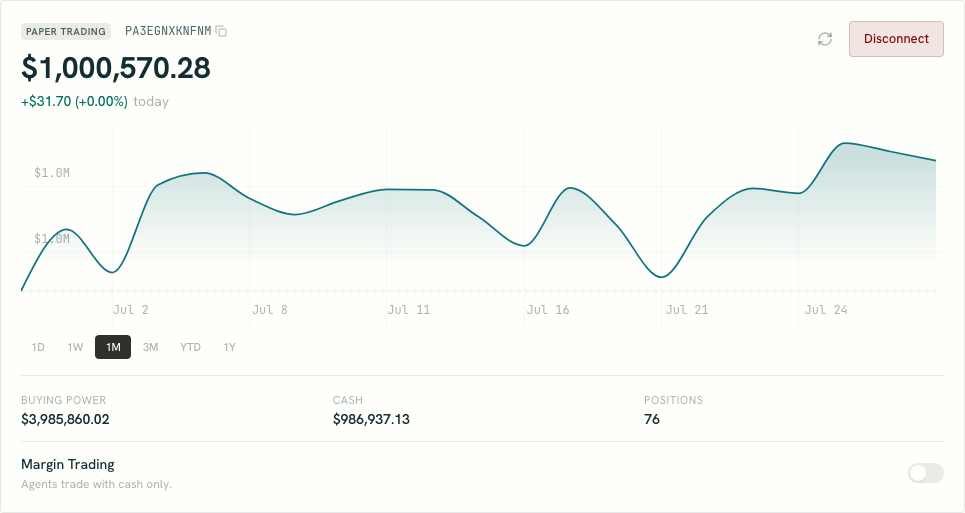
The page is headed Alpaca Paper Trading or Alpaca Live Trading, with a badge reading Paper Trading or Brokerage so you always know which account you are looking at. Below that:
- Account equity as the headline number, with the day’s P&L beside it
- Three tiles: Buying Power, Cash, and Positions
- An equity chart with
1D,1W,1M,3M,YTD, and1Yranges - Positions, with symbol, quantity, average cost, current price, market value, unrealized P&L, and the strategy that opened each one
- Quick Trade, for placing a manual BUY or SELL without leaving the page
- Orders, your recent order history with per-order Cancel and a Load More control
The Margin Toggle
The account card carries a Margin Trading switch, and it is the one setting on this page that changes what your agents are allowed to spend.- Off, it reads “Agents trade with cash only.”
- On, it reads “Agents can trade using your full buying power, including margin.”
Other Ways to Connect Alpaca
The portfolio page is not the only entry point. The same disclosures-then-OAuth flow is available from:- Chat. The Connect a platform card lists Alpaca Paper and Alpaca Live with their own Connect buttons.
- Add Trading Platforms. This menu lists both accounts and marks them Connected once linked.
- The invest flow. When you deploy a strategy, the account step lets you connect either account inline.
- The Alpaca pages directly. Visiting
/portfolio/alpaca-paperor/portfolio/alpaca-livewhile unlinked shows an Account Not Connected notice with a Connect Alpaca Paper or Connect Alpaca Live button.
How Orders Behave
Alpaca is a brokerage venue with asynchronous fills, which is the detail most worth internalizing before an agent starts trading.- Fills are asynchronous. An order can come back
PENDING, meaning it was submitted but not yet filled. Orders use day time-in-force, and anything placed outside US market hours stays pending until the next open. Pending orders are reconciled automatically. - Positions and cash update on terminal states only. A partial fill on a live order is not reflected until the order is filled, cancelled, or expired.
- Equities use plain tickers.
AAPLis all you need. - Options use OPRA/OSI symbols. For example,
AAPL260919C00250000. Option positions carry a multiplier of 100, so market value is quantity times price times 100. - Fractional quantities work for equities. To size from a dollar budget, divide the budget by the price and round to two decimals.
- Slippage settings do not apply. The
slippage_bpsparameter is ignored for Alpaca. - Avoid trading in the Alpaca dashboard while a strategy is active on the same account. Concurrent manual trades and agent trades can put positions out of sync, which triggers reconciliation.
Troubleshooting
How to Disconnect Alpaca
Open the portfolio page for the account you want to remove —/portfolio/alpaca-paper or /portfolio/alpaca-live — and click Disconnect.
The confirmation is titled Disconnect Alpaca Paper or Disconnect Alpaca Live, and reads: “This will disconnect your Alpaca paper trading account from the platform. You can reconnect at any time.” Confirm, and you land back on your portfolio.
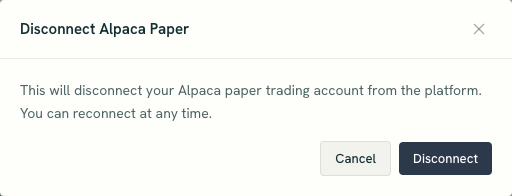 One guard applies. If an agent currently depends on the account, the disconnect is refused with a Cannot Disconnect notice: “The following agents depend on this connection and must be paused or deleted first.” The blocking agents are listed by name, so nothing breaks silently. Pause or delete them, then disconnect.
Final Checklist
Before you point an agent at the account, confirm:- Mode: You connected the account you meant to — paper for verification, live for real orders.
- Authorization: You completed login on Alpaca’s own page, including any two-factor step.
- Status: The account appears under Your Venues on the portfolio page.
- Data: Equity, buying power, cash, positions, and orders load on the account’s page.
- Margin: The Margin Trading toggle is set the way you intend, and off unless you want agents using margin.
- Symbols: You know equities use plain tickers and options use OPRA/OSI symbols.
- Fills: You expect
PENDINGorders off-hours, and know positions update only on terminal states. - Exit: You know that agents depending on the account will block a disconnect.