

- How the Hyperliquid connection works, and why it needs a bridge
- Why you should start with the paper account, which needs none of this
- How to open the wallet, fund Arbitrum, deposit to Hyperliquid, and enable trading
- Where your money lives, how to move it, and what each move costs
- How orders, leverage, and shorting behave
- How to withdraw, troubleshoot, and disconnect
How the Hyperliquid Connection Works
Three things have to happen before an agent can place an order, and all three are visible as a checklist on the Hyperliquid page. A wallet. Scalar Field creates a self-custodied wallet through Privy with an email login. For Hyperliquid, the relevant chain is Arbitrum, and the same wallet also serves Polymarket on Polygon and Jupiter on Solana. A bridge deposit. Hyperliquid holds USDC on its own exchange, so wallet funds have to cross a bridge — minimum $5, credited to your perps balance in about a minute. A trading key. A one-time approval that lets Scalar Field sign orders for you. The platform describes the boundary precisely: “Funds stay in your wallet; the key can trade but never withdraw.”Start With Paper, Not This
Hyperliquid has the best paper account on the platform, and it needs no wallet, no bridge, and no deposit. On the portfolio page, the Hyperliquid Paper card — “Practice crypto perps and spot with virtual USDC — live order books, real funding rates, shorts and leverage, no wallet needed” — is one click away via Start Paper Trading.
Paper fills are simulated against Hyperliquid’s live L2 order book, and shorts, cross leverage, hourly funding, and liquidations are all modelled. Strategy code that works on
HYPERLIQUID_PAPER runs unchanged against HYPERLIQUID. Perps are unforgiving enough that verifying on paper first is the obvious move — connect the live account when a strategy has earned it.
Before You Start
Step 1: Open Your Portfolio
Sign in and go toscalarfield.io/portfolio, then scroll to Connect More, headed “Add exchanges, brokerages, and trading venues.”
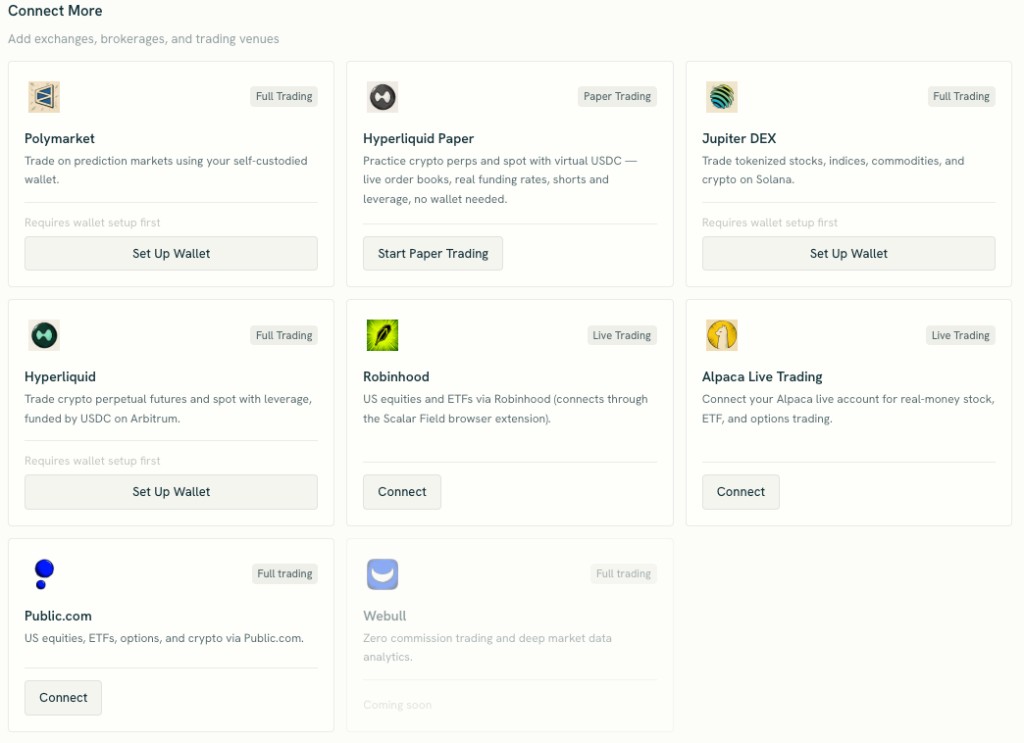 Note that there are two Hyperliquid cards: Hyperliquid for live trading, and Hyperliquid Paper for the simulated account.
Step 2: Click Set Up Wallet on the Hyperliquid Card
The Hyperliquid card reads “Trade crypto perpetual futures and spot with leverage, funded by USDC on Arbitrum,” with a Full Trading badge.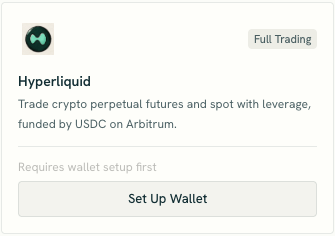 The button tells you which stage you are at:
If yours already reads Set Up Trading, skip to Step 7.
Step 3: Review and Accept the Disclosures
The modal is headed Acknowledgement of terms — “Review the following before activating your trading account.”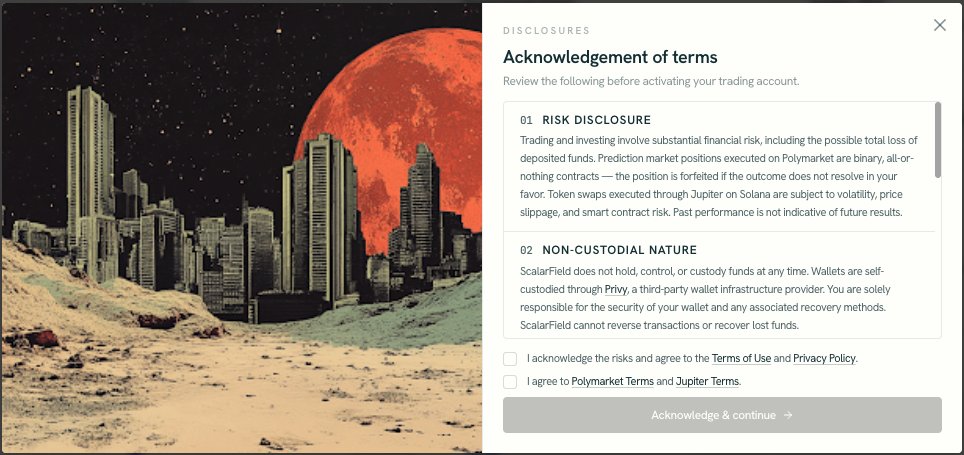 Seven numbered sections sit in a scrollable panel, with only the first two visible at rest. Section 01 Risk Disclosure covers total loss of deposited funds, and 02 Non-Custodial Nature is the one to read twice: Scalar Field does not hold, control, or custody funds at any time, wallets are self-custodied through Privy, and Scalar Field cannot reverse transactions or recover lost funds. The rest cover third-party services, no financial advice, eligibility, algorithmic trading under SEC and FINRA rules, and a beta disclaimer.
Leverage makes that first section less abstract than it sounds. A liquidation on a cross-margin perp position can take the whole balance, and no one can reverse it.
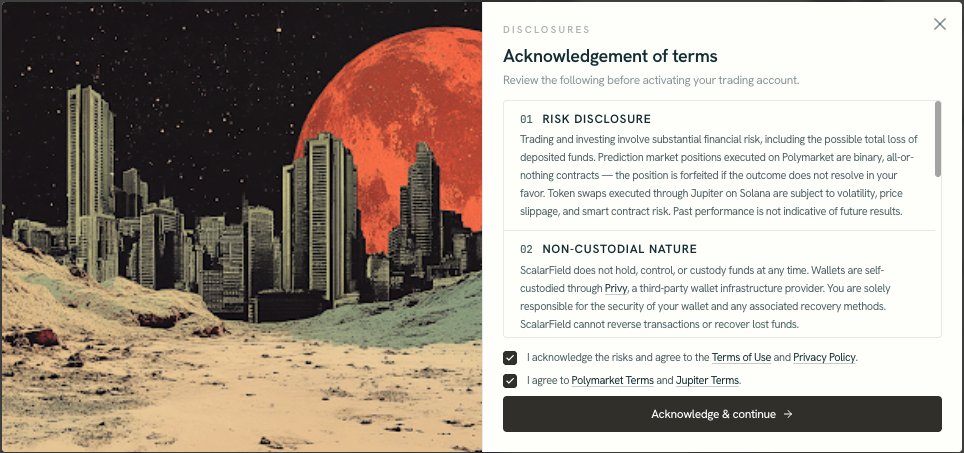
Tick both boxes — one for the Terms of Use and Privacy Policy, one for the third-party venue terms — and Acknowledge & continue becomes available.
Seven numbered sections sit in a scrollable panel, with only the first two visible at rest. Section 01 Risk Disclosure covers total loss of deposited funds, and 02 Non-Custodial Nature is the one to read twice: Scalar Field does not hold, control, or custody funds at any time, wallets are self-custodied through Privy, and Scalar Field cannot reverse transactions or recover lost funds. The rest cover third-party services, no financial advice, eligibility, algorithmic trading under SEC and FINRA rules, and a beta disclaimer.
Leverage makes that first section less abstract than it sounds. A liquidation on a cross-margin perp position can take the whole balance, and no one can reverse it.
Tick both boxes — one for the Terms of Use and Privacy Policy, one for the third-party venue terms — and Acknowledge & continue becomes available.
Step 4: Log In With Email
Setup starts immediately, and a Privy window opens reading Log in or sign up.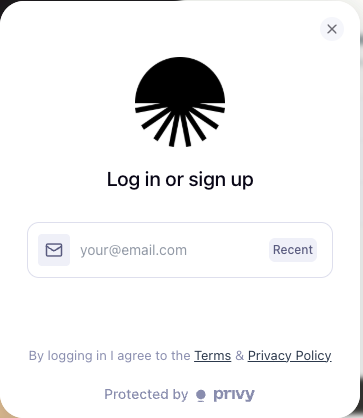 Enter your email, then the six-digit code Privy sends on the Enter confirmation code screen.
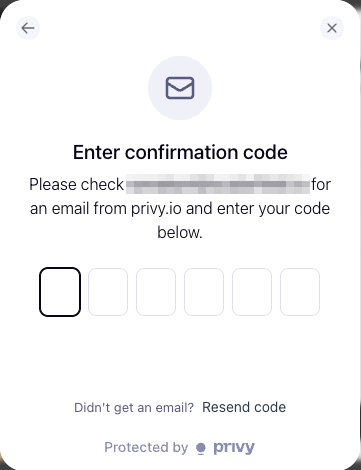 No password, no seed phrase — the email is the wallet’s security boundary.
Step 5: Watch the Wallet Get Built
The panel reads Opening wallet mandate — “Your custody wallet, signers, and venue permissions are being configured” — with an Execution Queue progress bar, and rows confirming custody Self-custodied, authentication Email via Privy, and venue coverage Polymarket + Jupiter + Hyperliquid.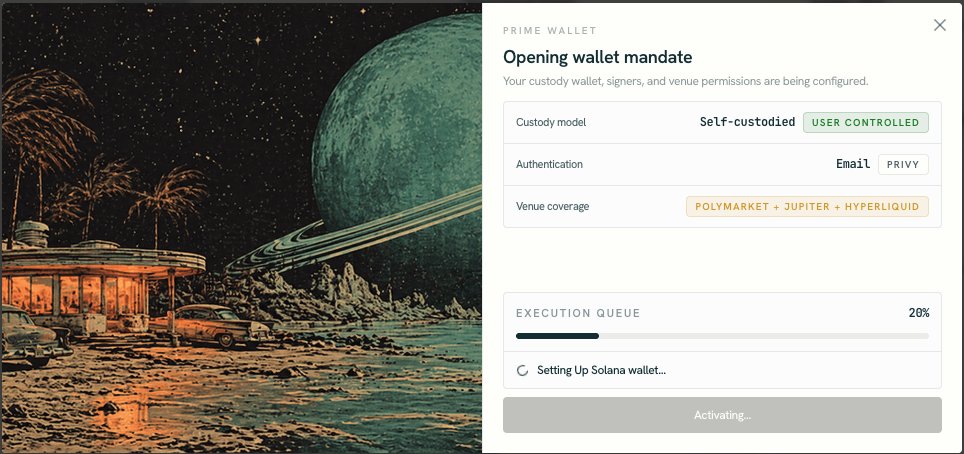 It then switches to Activating venues and shows your Polygon custody and Solana custody addresses.
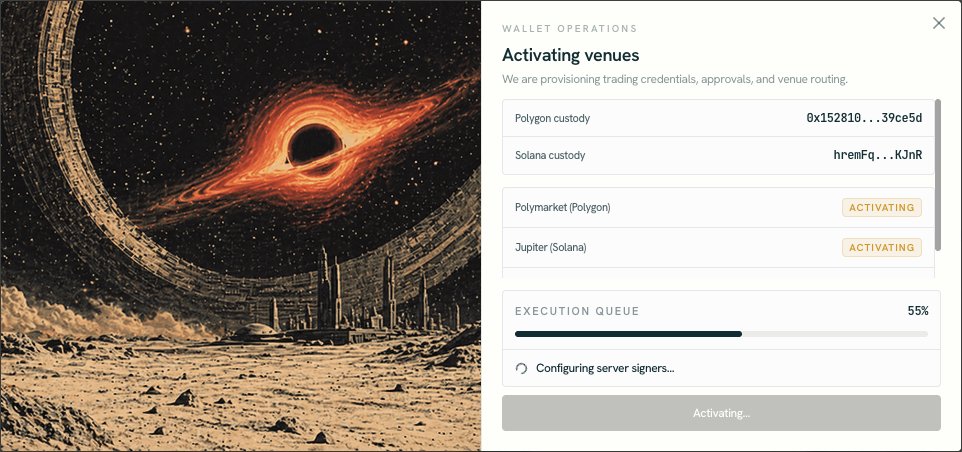 Your Arbitrum address is the same address as the Polygon one — both are EVM chains, so one wallet serves both. Nothing Hyperliquid-specific is provisioned in this queue, which is why there is more to do afterwards.
Step 6: Confirm the Wallet Is Live
The panel finishes at Execution wallet live — “Your self-custodied wallet is ready for market access.”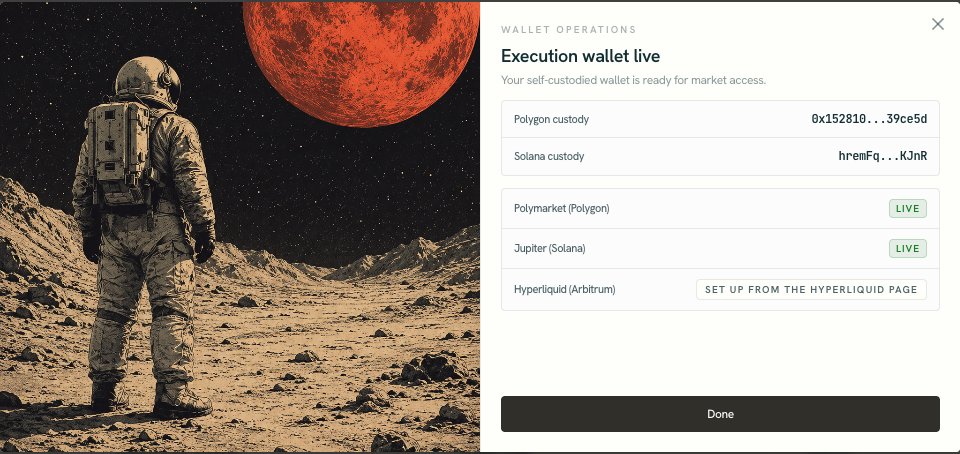 Polymarket and Jupiter read Live, but Hyperliquid (Arbitrum) reads Set up from the Hyperliquid page. That is expected: the wallet exists, and Hyperliquid’s own three steps are what remain.
Click Done.
Polymarket and Jupiter read Live, but Hyperliquid (Arbitrum) reads Set up from the Hyperliquid page. That is expected: the wallet exists, and Hyperliquid’s own three steps are what remain.
Click Done.
Step 7: Open the Hyperliquid Page
Back in Connect More, the Hyperliquid card now reads Set Up Trading.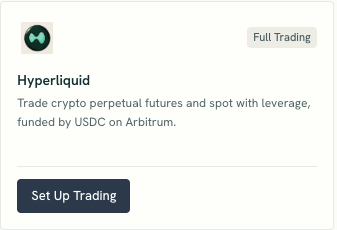 Click it, or go to
 scalarfield.io/portfolio/hyperliquid. You land on Set Up Hyperliquid Trading — “Trade crypto perpetual futures and spot, funded by USDC on Arbitrum” — a three-step checklist that tracks your progress and turns each step green as it completes.
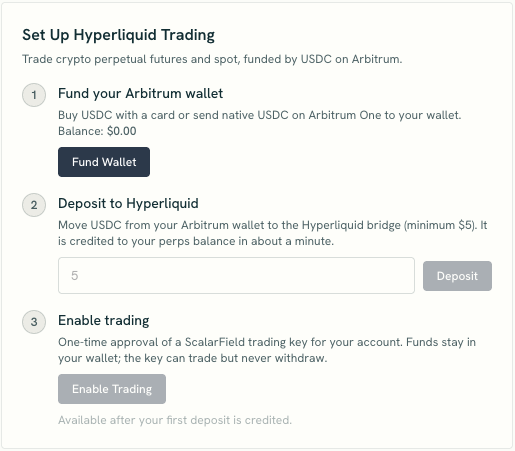 Steps 2 and 3 start unavailable — step 3 says so explicitly with “Available after your first deposit is credited.” Work down the list.
Step 8: Fund Your Arbitrum Wallet
Click Fund Wallet. The modal is headed Fund Your Wallet — “Add USDC to your Arbitrum wallet for Hyperliquid.”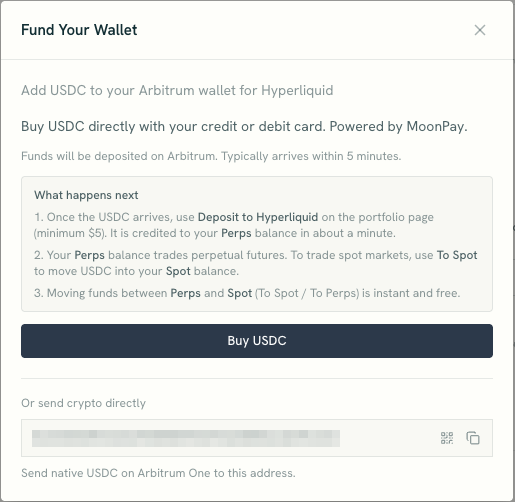 Buy with a card. Buy USDC opens MoonPay. Funds are deposited on Arbitrum and typically arrive within five minutes.
Send crypto directly. Under “Or send crypto directly” is your address, captioned “Send native USDC on Arbitrum One to this address.”
The What happens next box in that modal is the clearest summary of the whole model, and it is worth reading before you send anything:
Buy with a card. Buy USDC opens MoonPay. Funds are deposited on Arbitrum and typically arrive within five minutes.
Send crypto directly. Under “Or send crypto directly” is your address, captioned “Send native USDC on Arbitrum One to this address.”
The What happens next box in that modal is the clearest summary of the whole model, and it is worth reading before you send anything:
- Once the USDC arrives, use Deposit to Hyperliquid on the portfolio page (minimum $5). It is credited to your Perps balance in about a minute.
- Your Perps balance trades perpetual futures. To trade spot markets, use To Spot to move USDC into your Spot balance.
- Moving funds between Perps and Spot is instant and free.
Step 9: Deposit to Hyperliquid
With USDC in the wallet, step 1 turns green and step 2 opens up. Enter an amount and click Deposit.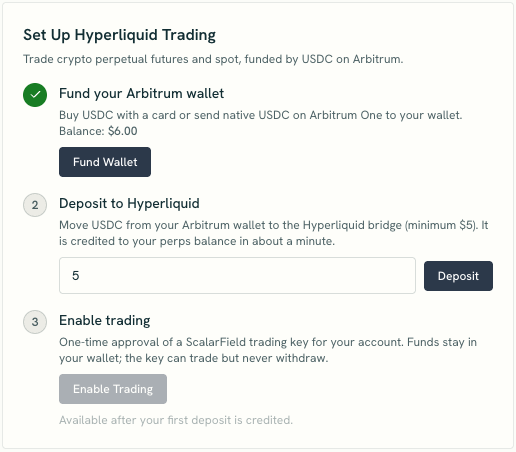 The rule to respect: **minimum 5 USDC — smaller amounts are lost by the bridge.” That is not a platform policy but a property of the bridge, and the funds do not come back.
While the bridge works, the step shows “Waiting for the bridge to credit your deposit”, sometimes with a transaction hash.
The rule to respect: **minimum 5 USDC — smaller amounts are lost by the bridge.” That is not a platform policy but a property of the bridge, and the funds do not come back.
While the bridge works, the step shows “Waiting for the bridge to credit your deposit”, sometimes with a transaction hash.
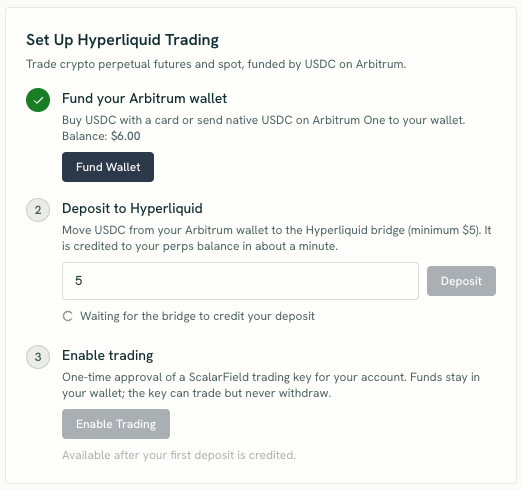 It usually takes about a minute. You can close the page — progress is tracked on the portfolio page, and the deposit is polled for several minutes before it gives up and tells you to refresh.
Step 10: Enable Trading
Once the deposit is credited, steps 1 and 2 are green and Enable Trading becomes available.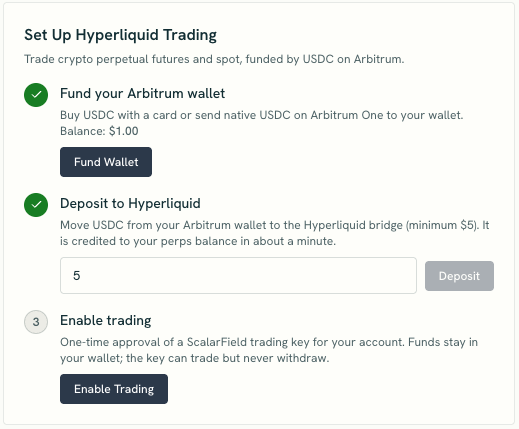 This is the one-time approval of a Scalar Field trading key for your account: “Funds stay in your wallet; the key can trade but never withdraw.” It is what lets an agent open a position at 4 a.m. without you approving anything, and it is scoped so that the key cannot move your money out.
Click Enable Trading. The page becomes your portfolio.
This is the one-time approval of a Scalar Field trading key for your account: “Funds stay in your wallet; the key can trade but never withdraw.” It is what lets an agent open a position at 4 a.m. without you approving anything, and it is scoped so that the key cannot move your money out.
Click Enable Trading. The page becomes your portfolio.
Step 11: Verify Your Hyperliquid Portfolio
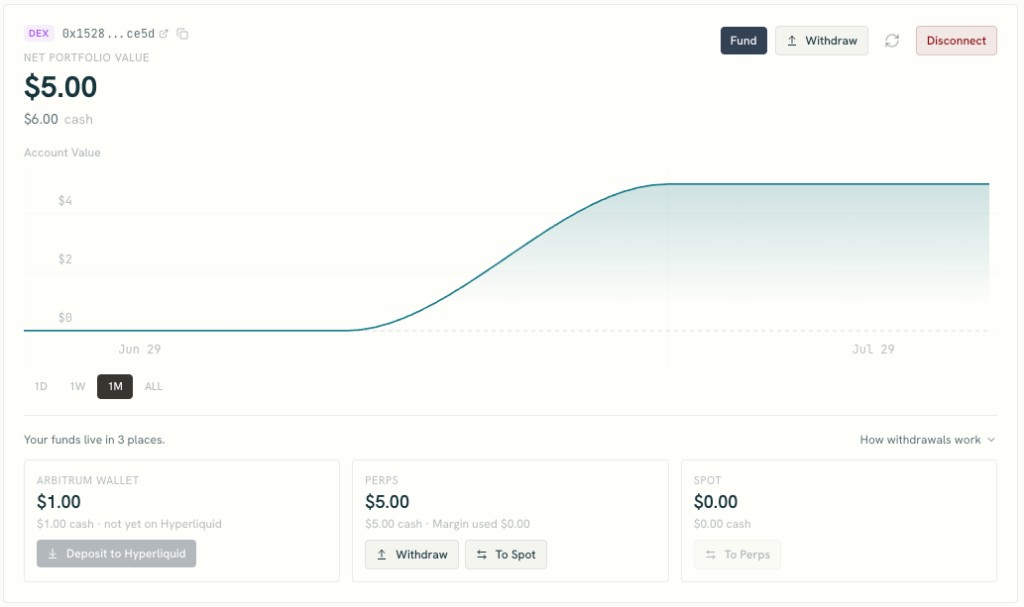 The header carries a DEX badge, your address — copyable, and linked to Hyperliquid’s explorer — plus Fund, Withdraw, refresh, and Disconnect.
Net Portfolio Value is the headline: your Hyperliquid perps account value plus everything in spot, positions included. The smaller cash line below it counts only idle USDC across all three places, which is why the two numbers disagree the moment you hold a position. In the screenshot above, net value is 6.00, because $1.00 is still sitting in the Arbitrum wallet and has not reached Hyperliquid.
Below that sits an Account Value chart with
The header carries a DEX badge, your address — copyable, and linked to Hyperliquid’s explorer — plus Fund, Withdraw, refresh, and Disconnect.
Net Portfolio Value is the headline: your Hyperliquid perps account value plus everything in spot, positions included. The smaller cash line below it counts only idle USDC across all three places, which is why the two numbers disagree the moment you hold a position. In the screenshot above, net value is 6.00, because $1.00 is still sitting in the Arbitrum wallet and has not reached Hyperliquid.
Below that sits an Account Value chart with 1D, 1W, 1M, and ALL ranges, then the section that makes this venue click: “Your funds live in 3 places.” The How withdrawals work expander beside it explains each one, and the rest of the page holds:
- Place Order, for manual market or limit orders with quantity, limit price, and slippage in basis points
- A leverage control, per market
- Positions, with market, type, side, size, entry, mark, liquidation price, leverage, value, and P&L
- Trade History, including direction and closed P&L per fill
- Quick links to the Hyperliquid Explorer and Arbiscan
Where Your Money Lives
Three buckets, and the difference between them is the thing to internalize.
Each card states its own status: the Arbitrum wallet says “not yet on Hyperliquid,” perps shows cash alongside margin used, and spot shows cash plus any tokens you hold. Buttons disable themselves when a move is impossible — no Deposit to Hyperliquid below 1 fee.
Moving between Perps and Spot in either direction is instant and free, so the only step that costs anything is the final withdrawal. Practically, that means keeping trading capital in perps, moving to spot only when a strategy trades spot markets, and moving it back before you cash out.
How Orders Behave
Perps have more moving parts than any other venue on the platform.- Symbols use an
H:prefix. Perps are readable, likeH:BTC. Spot uses canonical ids such asH:@142, shown asH:UBTC/USDC— never build a pair name yourself, since major spot assets are Unit-wrapped andH:BTC/USDCdoes not exist. Discover markets withscreenHyperliquidMarkets(). - Quantity is in the base asset, not dollars —
0.01forH:BTC. Size from a budget withround(budget / price, sz_decimals), since quantities that round to zero are rejected. - Selling more than your position opens a short. Perp positions carry signed quantities, and negative means short. There is no separate short call, which is easy to trip over.
- Orders below $10 notional are rejected on the live account. The manual order panel shows estimated notional next to that minimum.
- Market orders fill synchronously; limit orders rest. A limit order comes back as resting with an order id.
- Leverage is a venue setting, per coin — not per order. Changing it “applies to the whole position and every future order on this coin,” and it defaults to cross margin. If a live strategy holds that coin, you have to pause it before changing leverage, because the change re-margins its position.
- Funding accrues hourly on perp positions, and can be paid or received.
How to Withdraw
Click Withdraw. The modal is titled Withdraw to Arbitrum: “Withdrawals are sent from your Perps balance to your Arbitrum wallet,” with a route diagram reading Spot → Perps → Arbitrum Wallet.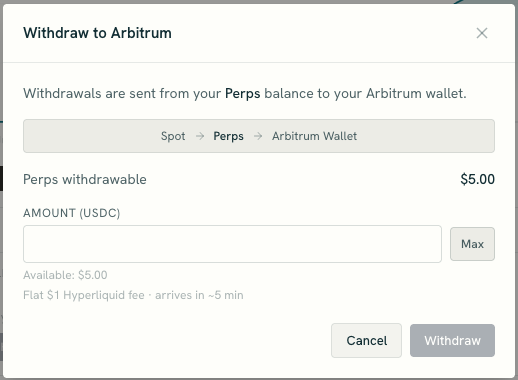 It shows your Perps withdrawable balance, an amount field with Max, and the terms: “Flat 1, since the fee comes out of it, and the modal previews what will actually land in your wallet.
If you hold funds in Spot, the modal says so — they cannot be withdrawn directly, and it offers Move Spot to Perps to fix it in one click, instantly and free.
Withdrawing lands USDC back in your Arbitrum wallet, which is your own self-custodied wallet. From there you can send it anywhere on Arbitrum, or leave it for a future deposit.
It shows your Perps withdrawable balance, an amount field with Max, and the terms: “Flat 1, since the fee comes out of it, and the modal previews what will actually land in your wallet.
If you hold funds in Spot, the modal says so — they cannot be withdrawn directly, and it offers Move Spot to Perps to fix it in one click, instantly and free.
Withdrawing lands USDC back in your Arbitrum wallet, which is your own self-custodied wallet. From there you can send it anywhere on Arbitrum, or leave it for a future deposit.
Troubleshooting
How to Disconnect
Click Disconnect on the Hyperliquid page.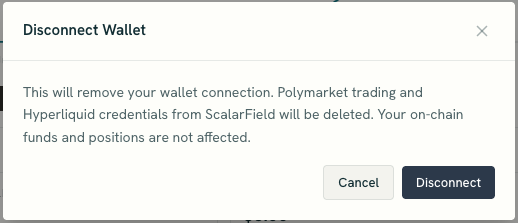 The confirmation reads: “This will remove your wallet connection. Polymarket trading and Hyperliquid credentials from ScalarField will be deleted. Your on-chain funds and positions are not affected.”
Two things to be clear about. First, this disconnects the whole wallet, not just Hyperliquid — Polymarket and Jupiter go with it, even though only Polymarket is named. There is no way to detach one venue.
Second, your money is untouched. USDC deposited on Hyperliquid stays on Hyperliquid, positions stay open, and the Arbitrum wallet balance stays where it is. Disconnecting removes Scalar Field’s trading key, not your funds — but open perp positions keep running with no agent managing them, so close or hand them off before you disconnect rather than after.
If an agent currently depends on the connection, the disconnect is refused with a Cannot Disconnect notice listing the agents by name.
The confirmation reads: “This will remove your wallet connection. Polymarket trading and Hyperliquid credentials from ScalarField will be deleted. Your on-chain funds and positions are not affected.”
Two things to be clear about. First, this disconnects the whole wallet, not just Hyperliquid — Polymarket and Jupiter go with it, even though only Polymarket is named. There is no way to detach one venue.
Second, your money is untouched. USDC deposited on Hyperliquid stays on Hyperliquid, positions stay open, and the Arbitrum wallet balance stays where it is. Disconnecting removes Scalar Field’s trading key, not your funds — but open perp positions keep running with no agent managing them, so close or hand them off before you disconnect rather than after.
If an agent currently depends on the connection, the disconnect is refused with a Cannot Disconnect notice listing the agents by name.
Final Checklist
Before you point an agent at the account, confirm:- Paper first: You have run the strategy on
HYPERLIQUID_PAPER, which costs nothing and needs no wallet. - Wallet: Setup finished and you know which email opens it.
- Funding: You sent native USDC on Arbitrum One.
- Bridge: You deposited at least $5 and it shows in your Perps balance.
- Trading key: Enable Trading is done, and the page shows the portfolio rather than the checklist.
- Placement: Your capital is in the bucket the strategy trades from — perps for futures, spot for spot markets.
- Leverage: Set deliberately, per coin, knowing it defaults to cross margin.
- Sizing: You know quantities are in the base asset and live orders need $10 of notional.
- Shorts: You know selling more than your position opens a short.
- Exit: You know withdrawals come only from perps, cost a flat $1, and that disconnecting leaves positions open.