

- How the Polymarket connection works, and why it creates a wallet instead of linking an account
- What you need before you start — and why paper trading needs none of it
- How to accept the disclosures and open the wallet with an email login
- What each step of the setup queue is actually provisioning
- How to fund the wallet, and what pUSD and the deposit wallet mean
- How orders behave, how to withdraw, how to troubleshoot, and how to disconnect
How the Polymarket Connection Works
Polymarket markets are binary or multi-outcome events. Their outcome tokens trade between 1.00, so a price reads directly as a probability — a token at $0.36 is the market saying 36%. To trade them you need a wallet on Polygon. Scalar Field creates one for you through Privy, a wallet infrastructure provider, using nothing but an email login. The wallet is self-custodied: it is yours, Scalar Field cannot move funds out of it, and it cannot recover it for you either. One wallet covers three venues. The same setup provisions Polymarket on Polygon and Jupiter on Solana, and prepares the ground for Hyperliquid, which you finish from its own page.
If you only want to test, you can skip this entire guide.
POLYMARKET_PAPER is provisioned automatically the first time an agent uses it — no wallet, no funding, no connection. Paper fills are simulated against the live order book with real taker fees, so behavior tracks live closely. Connect the live wallet when you are ready to put real money behind a strategy.
Before You Start
There is no browser extension, no supported-browser list, and no desktop-only restriction. You do not need an existing crypto wallet, and you do not need a Polymarket account — the wallet Scalar Field creates is the account.
Step 1: Open Your Portfolio
Sign in to Scalar Field and click Portfolio in the left sidebar, or go directly toscalarfield.io/portfolio.
Scroll to the Connect More section, headed “Add exchanges, brokerages, and trading venues.”
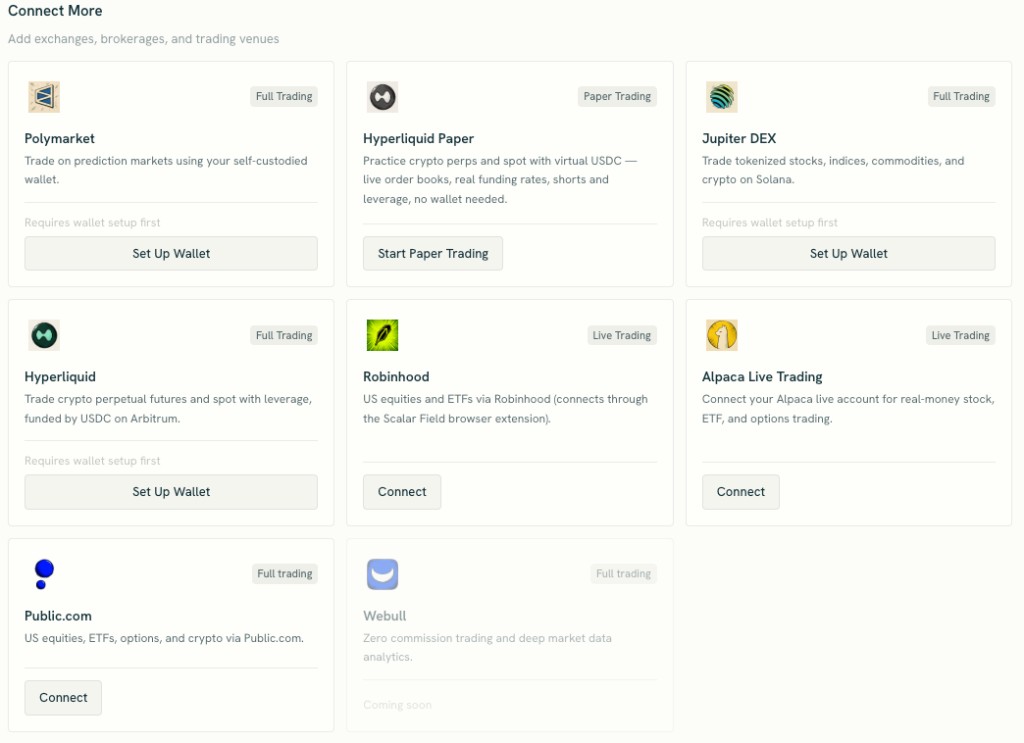 Three cards there — Polymarket, Jupiter DEX, and Hyperliquid — all read Requires wallet setup first and all offer Set Up Wallet. That is not three separate setups. It is one wallet, reachable from any of the three.
Step 2: Click Set Up Wallet on the Polymarket Card
The Polymarket card is described as “Trade on prediction markets using your self-custodied wallet,” carrying a Full Trading badge.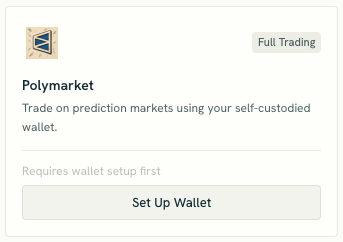 Click Set Up Wallet.
If you already have a wallet and the button reads Activate Trading instead, your wallet exists but Polymarket’s credentials or approvals did not finish provisioning. Clicking it completes just that part, and the rest of this guide from Step 7 onward still applies.
Click Set Up Wallet.
If you already have a wallet and the button reads Activate Trading instead, your wallet exists but Polymarket’s credentials or approvals did not finish provisioning. Clicking it completes just that part, and the rest of this guide from Step 7 onward still applies.
Step 3: Review and Accept the Disclosures
The modal is headed Acknowledgement of terms, with the subtitle “Review the following before activating your trading account.”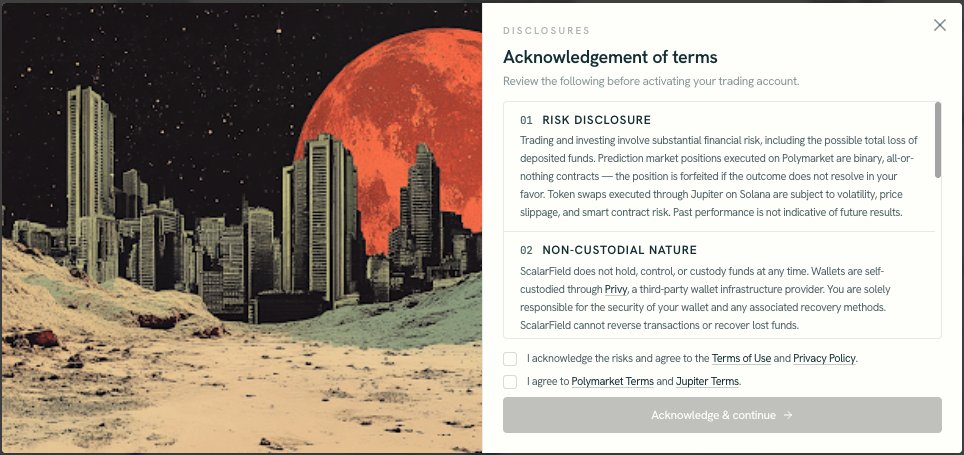 There are seven numbered sections in a scrollable panel, and only the first two are visible at rest. Scroll to read the others.
Section 02 is the one worth reading twice. Self-custody means no support ticket can undo a mistake — no password reset, no reversal, no recovery of funds sent to a wrong address.
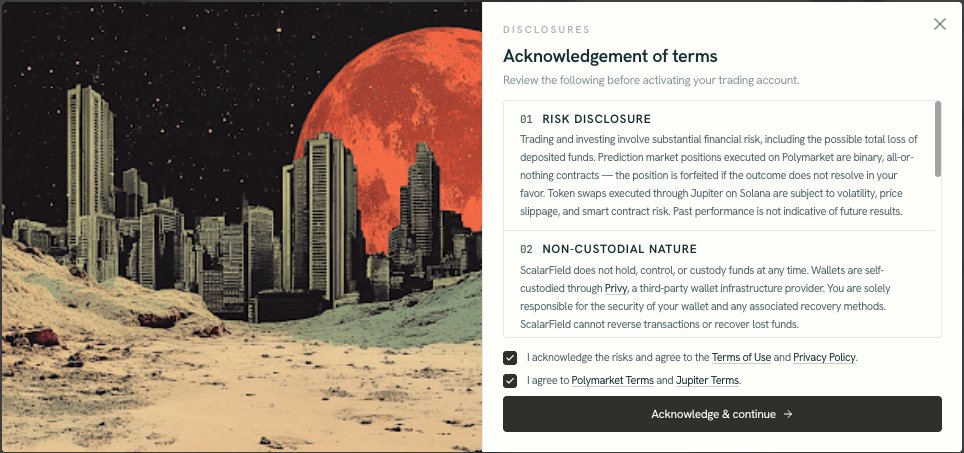
Two separate checkboxes must be ticked:
- “I acknowledge the risks and agree to the Terms of Use and Privacy Policy.”
- “I agree to Polymarket Terms and Jupiter Terms.”
Step 4: Log In With Email
Clicking Acknowledge & continue starts setup immediately, and a Privy window opens over the page reading Log in or sign up. Enter your email.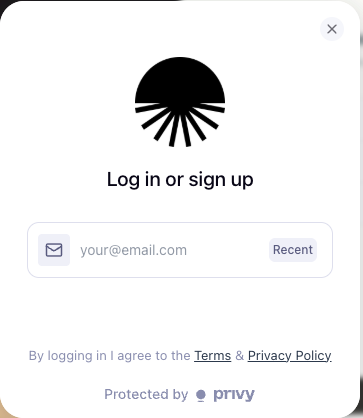 Privy emails a six-digit code and asks for it on the next screen, headed Enter confirmation code. If it does not arrive, Resend code is at the bottom of that window.
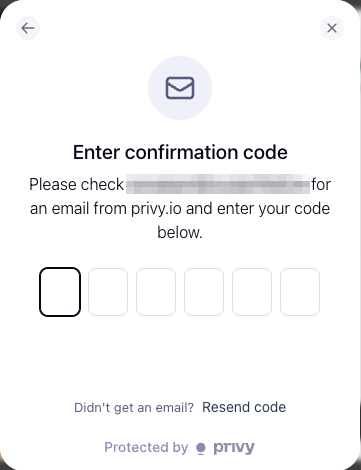 This login is the whole authentication story. There is no password and no seed phrase to write down — access to the email is access to the wallet, which is worth keeping in mind when you decide how much to fund it with.
If you dismiss the Privy window by accident, the panel behind it is headed Create trading access with a Continue with Email button. Click that to start again.
This login is the whole authentication story. There is no password and no seed phrase to write down — access to the email is access to the wallet, which is worth keeping in mind when you decide how much to fund it with.
If you dismiss the Privy window by accident, the panel behind it is headed Create trading access with a Continue with Email button. Click that to start again.
Step 5: Watch the Wallet Get Built
Once the code is accepted, the panel switches to Opening wallet mandate — “Your custody wallet, signers, and venue permissions are being configured” — and an Execution Queue progress bar starts moving.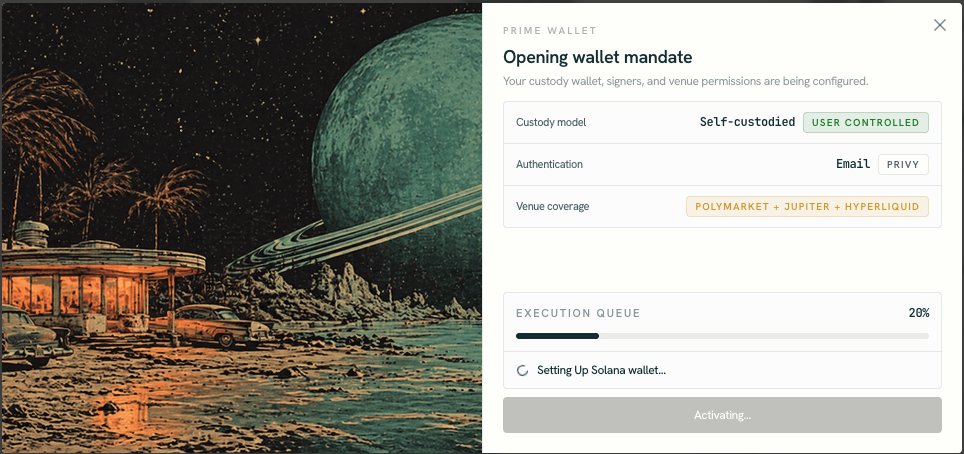 The three rows above the bar summarize what you are getting: custody model Self-custodied, marked User controlled; authentication Email, via Privy; and venue coverage Polymarket + Jupiter + Hyperliquid.
Partway through, the panel becomes Activating venues — “We are provisioning trading credentials, approvals, and venue routing” — and your two addresses appear, Polygon custody and Solana custody, with per-venue status badges beside them.
The three rows above the bar summarize what you are getting: custody model Self-custodied, marked User controlled; authentication Email, via Privy; and venue coverage Polymarket + Jupiter + Hyperliquid.
Partway through, the panel becomes Activating venues — “We are provisioning trading credentials, approvals, and venue routing” — and your two addresses appear, Polygon custody and Solana custody, with per-venue status badges beside them.
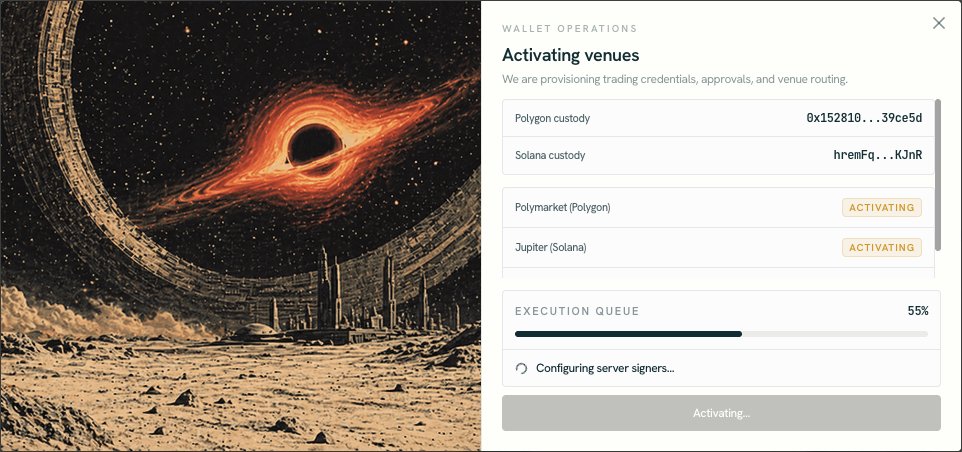 The status line under the bar names each step as it runs:
Server signers is the step worth understanding. Your agents need to place orders while you are not at the keyboard, which means something has to sign those orders. This step authorizes Scalar Field’s backend as a signer on your wallet, within the permissions granted here — that is what makes unattended trading possible without handing over your keys.
You do not have to sit and watch. Closing the modal leaves a banner reading “Setting up your wallet…” with the note “You can close this and setup will continue in the background.”
Step 6: Confirm the Wallet Is Live
When the queue finishes, the panel reads Execution wallet live — “Your self-custodied wallet is ready for market access.”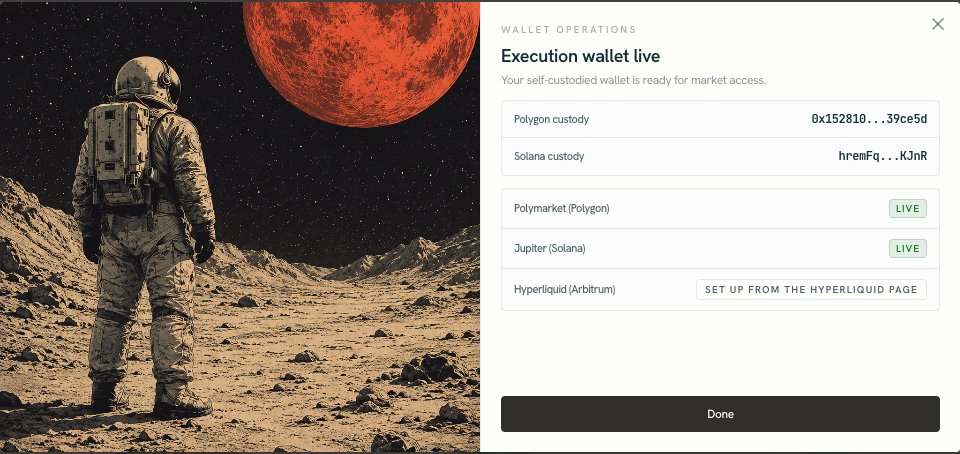 Both Polymarket (Polygon) and Jupiter (Solana) should be marked Live. Hyperliquid (Arbitrum) reads Set up from the Hyperliquid page — it uses the same wallet but needs its own setup, funded with USDC on Arbitrum, and none of that blocks Polymarket.
Click Done.
Both Polymarket (Polygon) and Jupiter (Solana) should be marked Live. Hyperliquid (Arbitrum) reads Set up from the Hyperliquid page — it uses the same wallet but needs its own setup, funded with USDC on Arbitrum, and none of that blocks Polymarket.
Click Done.
Step 7: Verify Your Polymarket Account
Polymarket now appears under Your Venues with a Prediction Market badge. Click it, or go to
 scalarfield.io/portfolio/polymarket.
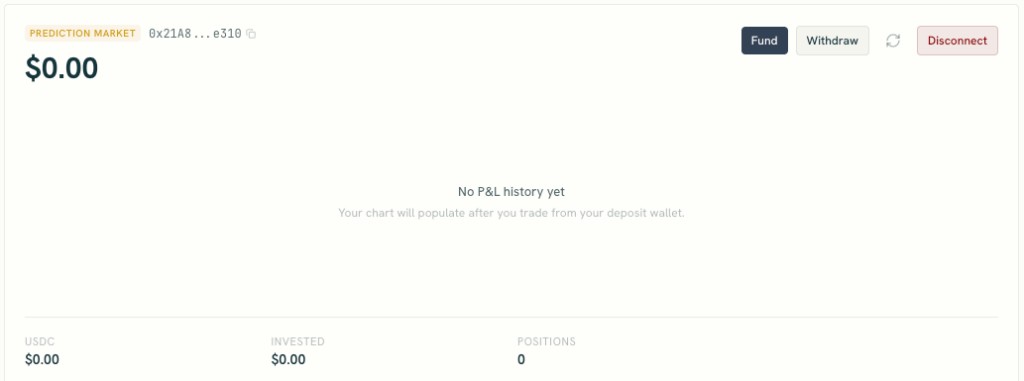 The page header shows your wallet address, copyable in one click, alongside Fund, Withdraw, a refresh control, and Disconnect. Below that sit your tradeable balance, tiles for USDC, Invested, and Positions, and an empty chart reading “No P&L history yet — Your chart will populate after you trade from your deposit wallet.”
Everything reads zero, which is correct. The wallet is connected; it just has no money in it.
The page header shows your wallet address, copyable in one click, alongside Fund, Withdraw, a refresh control, and Disconnect. Below that sit your tradeable balance, tiles for USDC, Invested, and Positions, and an empty chart reading “No P&L history yet — Your chart will populate after you trade from your deposit wallet.”
Everything reads zero, which is correct. The wallet is connected; it just has no money in it.
Step 8: Fund the Wallet
Click Fund. The Fund Your Wallet modal offers two routes to the same place.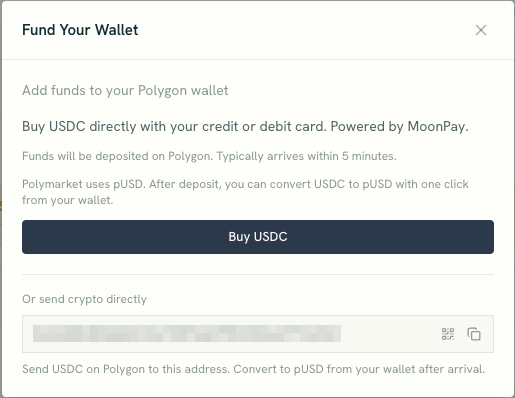 Buy with a card. Buy USDC opens MoonPay: “Buy USDC directly with your credit or debit card.” Funds are deposited on Polygon and typically arrive within five minutes.
Send crypto directly. Under “Or send crypto directly” is your address, with a QR code and a copy button: “Send USDC on Polygon to this address.”
Two constraints matter, and getting either wrong loses the funds:
Buy with a card. Buy USDC opens MoonPay: “Buy USDC directly with your credit or debit card.” Funds are deposited on Polygon and typically arrive within five minutes.
Send crypto directly. Under “Or send crypto directly” is your address, with a QR code and a copy button: “Send USDC on Polygon to this address.”
Two constraints matter, and getting either wrong loses the funds:
- The network must be Polygon. If you are withdrawing from an exchange, select Polygon as the network, not Ethereum or any other chain.
- Send USDC, the native Polygon USDC.
pUSD and the Deposit Wallet
This is the one genuinely confusing part of Polymarket, and it explains most “my money is there but I can’t trade” confusion. Funds pass through two changes before they are tradeable. First, the token changes. You fund with USDC, but Polymarket settles in pUSD. Converting is one click from your wallet — the platform swaps USDC through bridged USDC.e into pUSD, showing each leg as it goes, and it usually takes 15 to 30 seconds. When there is unconverted USDC sitting in the wallet, a banner offers Convert to pUSD. Second, the wallet changes. You have two addresses on Polygon:
Orders are placed by the deposit wallet, so a balance in your own wallet is not yet a balance Polymarket can use. Scalar Field says so directly with a banner:
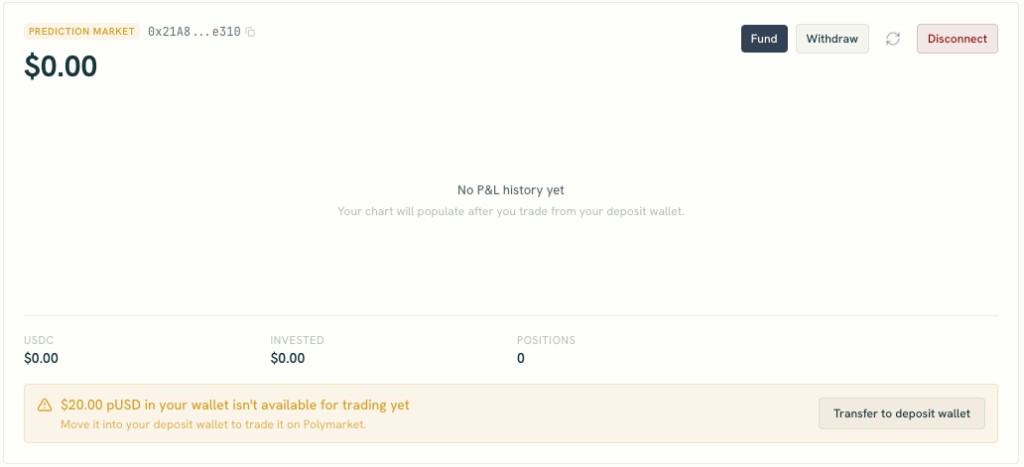 “0.00: the headline number tracks what is actually tradeable, not everything you own.
 Click Transfer to deposit wallet.
Step 9: Move Funds Into the Deposit Wallet
The dialog is headed Transfer to Deposit Wallet: “Move funds sitting in your wallet into your deposit wallet so they can be traded on Polymarket.” Enter an amount, or click MAX for the full balance.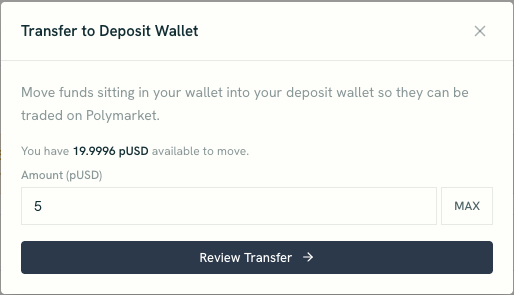 You do not have to move everything. Transferring in tranches is a reasonable way to cap what an agent can reach while you are still evaluating it.
Click Review Transfer. Confirm Transfer shows the amount, From your wallet (EOA), and To your deposit wallet address.
You do not have to move everything. Transferring in tranches is a reasonable way to cap what an agent can reach while you are still evaluating it.
Click Review Transfer. Confirm Transfer shows the amount, From your wallet (EOA), and To your deposit wallet address.
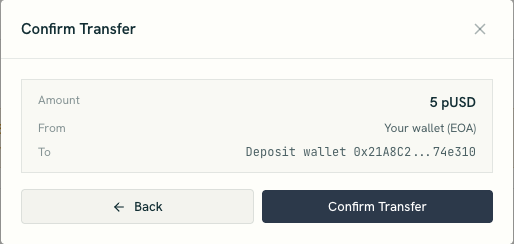 Click Confirm Transfer. Gas is sponsored, so there is no network fee to cover and nothing else to approve — leave the window open while it runs. If you are moving USDC rather than pUSD, it is converted to pUSD in the deposit wallet as part of the same operation.
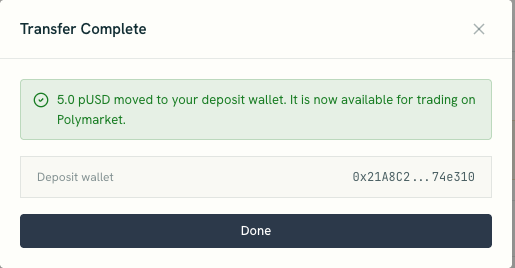 Transfer Complete confirms the amount “moved to your deposit wallet. It is now available for trading on Polymarket.” Click Done.
The portfolio page now reflects it. A pUSD (tradeable) tile appears with the transferred amount, and the headline balance matches.
Transfer Complete confirms the amount “moved to your deposit wallet. It is now available for trading on Polymarket.” Click Done.
The portfolio page now reflects it. A pUSD (tradeable) tile appears with the transferred amount, and the headline balance matches.
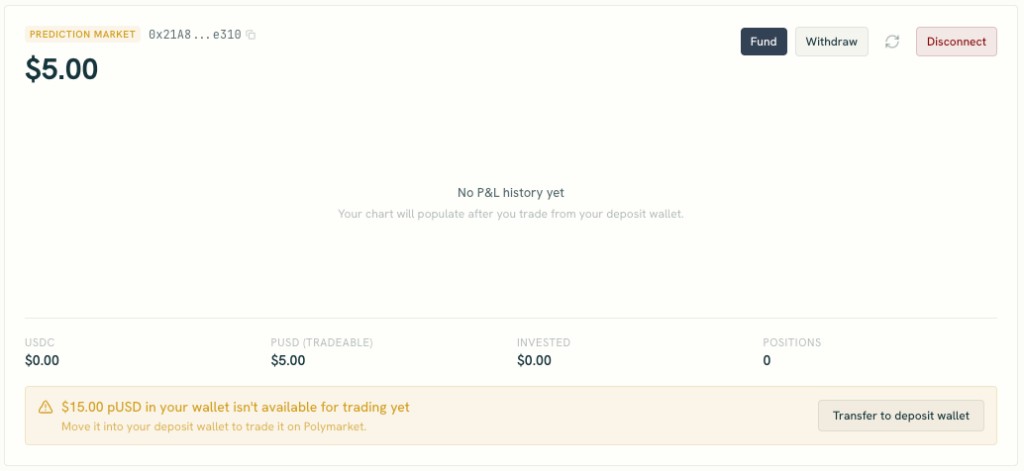 Anything you left behind keeps its own banner — in the screenshot above, 15.00 is still waiting in the wallet. That is not an error. It is exactly what a partial transfer looks like, and one Transfer to deposit wallet click moves the rest whenever you want.
Your agents and strategies can now trade this account.
Anything you left behind keeps its own banner — in the screenshot above, 15.00 is still waiting in the wallet. That is not an error. It is exactly what a partial transfer looks like, and one Transfer to deposit wallet click moves the rest whenever you want.
Your agents and strategies can now trade this account.
How to Withdraw
Click Withdraw on the portfolio page.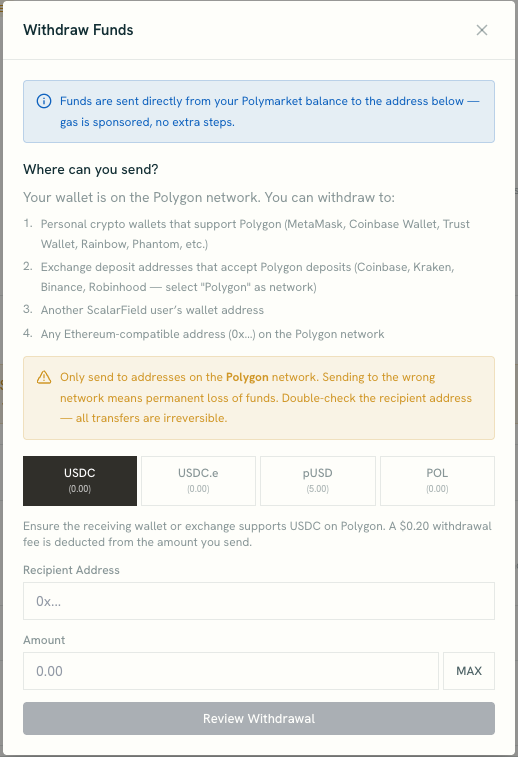 Pick a token — USDC, USDC.e, pUSD, or POL, each showing its balance — then enter a recipient address and an amount. Funds are sent directly from your Polymarket balance and gas is sponsored, so there are no intermediate steps.
Valid destinations are listed in the modal: personal wallets that support Polygon (MetaMask, Coinbase Wallet, Trust Wallet, Rainbow, Phantom), exchange deposit addresses that accept Polygon deposits (Coinbase, Kraken, Binance, Robinhood — selecting “Polygon” as the network), another Scalar Field user’s address, or any Polygon
Pick a token — USDC, USDC.e, pUSD, or POL, each showing its balance — then enter a recipient address and an amount. Funds are sent directly from your Polymarket balance and gas is sponsored, so there are no intermediate steps.
Valid destinations are listed in the modal: personal wallets that support Polygon (MetaMask, Coinbase Wallet, Trust Wallet, Rainbow, Phantom), exchange deposit addresses that accept Polygon deposits (Coinbase, Kraken, Binance, Robinhood — selecting “Polygon” as the network), another Scalar Field user’s address, or any Polygon 0x address.
The warning in that modal deserves quoting in full, because self-custody gives you no second chance: “Only send to addresses on the Polygon network. Sending to the wrong network means permanent loss of funds. Double-check the recipient address — all transfers are irreversible.”
A $0.20 withdrawal fee is deducted from stablecoin amounts.
How Orders Behave
Polymarket differs from a brokerage venue in ways that change how you write a strategy.- Symbols are outcome token IDs, not tickers. Take them from the
token_idscolumn ofscreenPolymarkets(). - Fills are synchronous. A trade call blocks until it fills or is rejected, on both live and paper accounts.
- Positions are all-or-nothing. Every market resolves at its end date, after which positions settle and can no longer be traded. Exit before resolution by policy — a position held through it cannot be managed.
- Slippage is configurable.
slippage_bpsdefaults to 500, or 5%, which suits thin prediction-market books. - Minimums are per market, typically 1 to 25+ shares. Keep order value at or above $1.00; smaller orders are rejected with
ORDER_BELOW_MINIMUM. - Fractional quantities work. Size from a dollar budget with
round(budget / price, 2)—int()floors to zero when the budget is below one share’s price. - Selling can leave dust. Treat positions under $0.10 of market value as closed.
- On-chain state lags slightly. Allow a moment for settlement before re-querying balances after a fill.
Troubleshooting
How to Disconnect
Openscalarfield.io/portfolio/polymarket and click Disconnect.
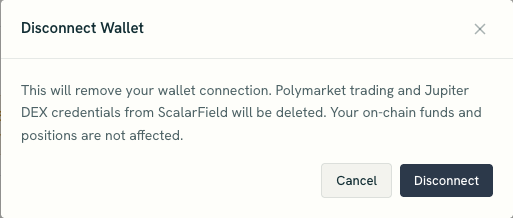 The confirmation is titled Disconnect Wallet: “This will remove your wallet connection. Polymarket trading and Jupiter DEX credentials from ScalarField will be deleted. Your on-chain funds and positions are not affected.”
That last sentence is the important one. Disconnecting removes Scalar Field’s ability to trade for you; it does not touch your money. Your wallet still exists, your balances and positions are still on-chain, and logging in with the same email restores access. Because it takes Jupiter’s credentials with it, expect to reconnect if you were using Jupiter too.
One guard applies. If an agent currently depends on the connection, the disconnect is refused with a Cannot Disconnect notice listing the agents by name, so nothing breaks silently. Pause or delete them, then disconnect.
The confirmation is titled Disconnect Wallet: “This will remove your wallet connection. Polymarket trading and Jupiter DEX credentials from ScalarField will be deleted. Your on-chain funds and positions are not affected.”
That last sentence is the important one. Disconnecting removes Scalar Field’s ability to trade for you; it does not touch your money. Your wallet still exists, your balances and positions are still on-chain, and logging in with the same email restores access. Because it takes Jupiter’s credentials with it, expect to reconnect if you were using Jupiter too.
One guard applies. If an agent currently depends on the connection, the disconnect is refused with a Cannot Disconnect notice listing the agents by name, so nothing breaks silently. Pause or delete them, then disconnect.
Final Checklist
Before you point an agent at the account, confirm:- Wallet: Setup finished, and Polymarket (Polygon) reads Live.
- Access: You know which email opens the wallet, and that it is the only credential.
- Funding: You sent USDC on the Polygon network — not another chain.
- Token: Your USDC is converted to pUSD.
- Wallet placement: The amount you intend to trade is in the deposit wallet, and a pUSD (tradeable) tile shows it.
- Sizing: You know minimums are per market and order value should be at or above $1.00.
- Symbols: Your strategy uses
token_idvalues fromscreenPolymarkets(), not tickers. - Resolution: Your strategy exits before markets resolve.
- Exit: You know disconnecting removes credentials, not funds.
Final Thoughts
The wallet setup is the easy half: two checkboxes, an email code, and a progress bar. The half that deserves your attention is the money — right network, right token, right wallet — because self-custody means those decisions are final in a way a broker connection never is. Start withPOLYMARKET_PAPER, which costs nothing and needs no wallet, and let a strategy prove itself against live order books first. When you connect the real wallet, fund it with an amount you would be comfortable losing entirely, and transfer to the deposit wallet in tranches rather than all at once. Prediction market positions are all-or-nothing by design, and sizing is the only real control you have over that.
For execution details and the full set of research functions available for prediction market strategies, see the Polymarket venue documentation.