

- How the Jupiter connection works, and what you can actually trade
- How to open the wallet, and what to do if you already have one
- How to activate Jupiter trading if it did not activate during setup
- How to fund the wallet with USDC on Solana
- How to read the portfolio page, and how to buy and sell manually
- How orders behave, how to withdraw, how to troubleshoot, and how to disconnect
How the Jupiter Connection Works
There is no Jupiter account. Jupiter is a router: it takes your USDC, finds the best path across Solana’s liquidity venues — Raydium, Orca, Meteora, and others — and swaps it for the token you asked for. That means the connection is really a wallet. Scalar Field creates a Solana wallet through Privy using an email login, and that wallet is self-custodied: your funds, your keys, and no ability for Scalar Field to withdraw. It holds USDC and your token positions, and all of it is publicly verifiable on-chain. The same setup also provisions Polymarket on Polygon, since one wallet setup covers both venues.
The tradeable universe is worth dwelling on, because it is the reason to connect Jupiter at all:
- Tokenized equities (xStocks) — tokens like
AAPLx,NVDAx, andTSLAx, each backed 1:1 by the underlying security, tradeable around the clock rather than only during US market hours. - Pre-IPO tokens — exposure to SpaceX, OpenAI, Anthropic, and Anduril.
- Index and commodity tokens — such as
SPYx,QQQx,GLDx, andSLVx. - Solana crypto — SOL, JUP, BONK, and any other Jupiter-verified token.
Before You Start
No browser extension, no existing crypto wallet, and no Jupiter account. If you already connected Polymarket, you may already have everything — skip to Step 7 and check whether Jupiter is marked live.
Step 1: Open Your Portfolio
Sign in to Scalar Field and click Portfolio in the left sidebar, or go toscalarfield.io/portfolio. Scroll to Connect More, headed “Add exchanges, brokerages, and trading venues.”
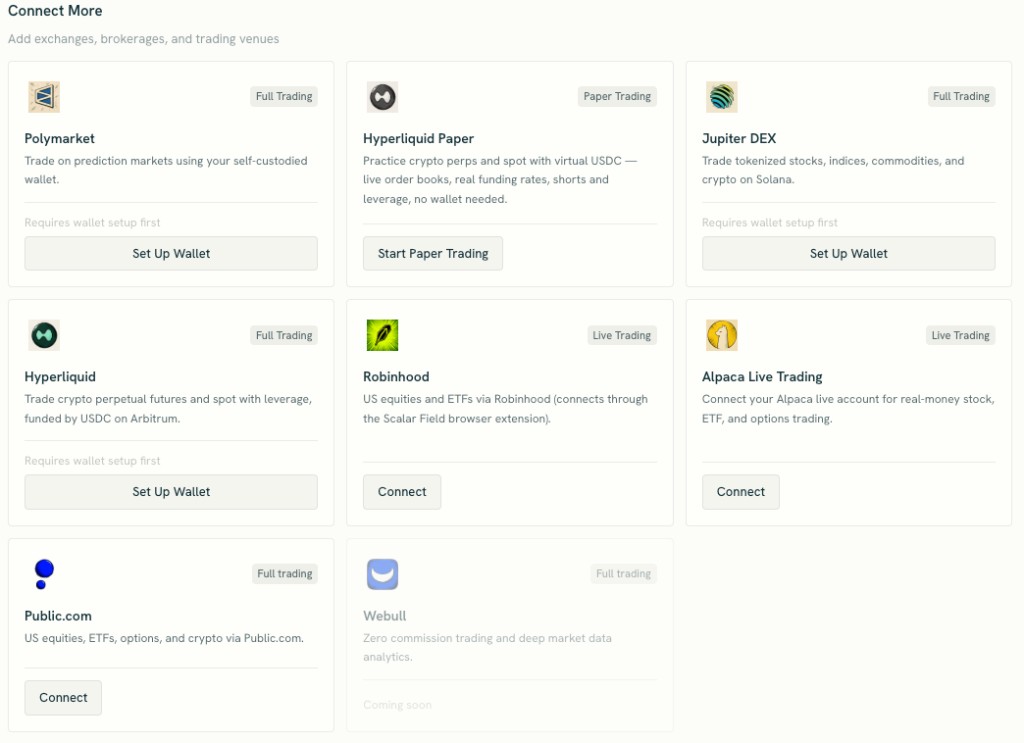
Step 2: Click Set Up Wallet on the Jupiter DEX Card
The Jupiter DEX card is described as “Trade tokenized stocks, indices, commodities, and crypto on Solana,” with a Full Trading badge.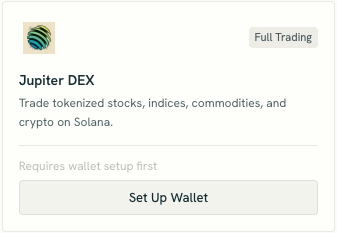 The button reflects how far along you already are:
Click Set Up Wallet and continue. If your button reads Activate Trading, skip ahead to If Jupiter Did Not Activate.
Step 3: Review and Accept the Disclosures
The modal is headed Acknowledgement of terms — “Review the following before activating your trading account.”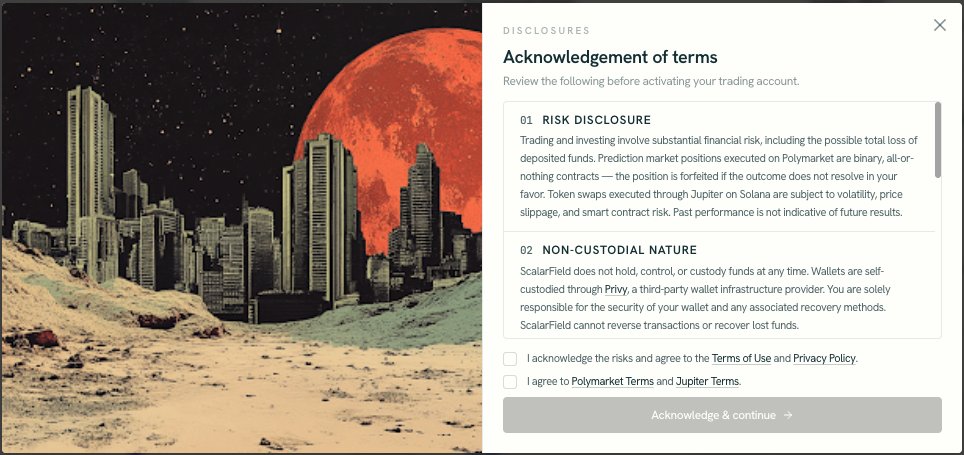 Seven numbered sections sit in a scrollable panel, with only the first two visible at rest. The ones that matter most for Jupiter:
Smart contract risk and slippage are specific to this venue. A swap on a thin token can fill well away from the price you saw, which is what the slippage setting exists to bound.
Tick both boxes — one for the Terms of Use and Privacy Policy, one for Polymarket Terms and Jupiter Terms — and Acknowledge & continue becomes available.
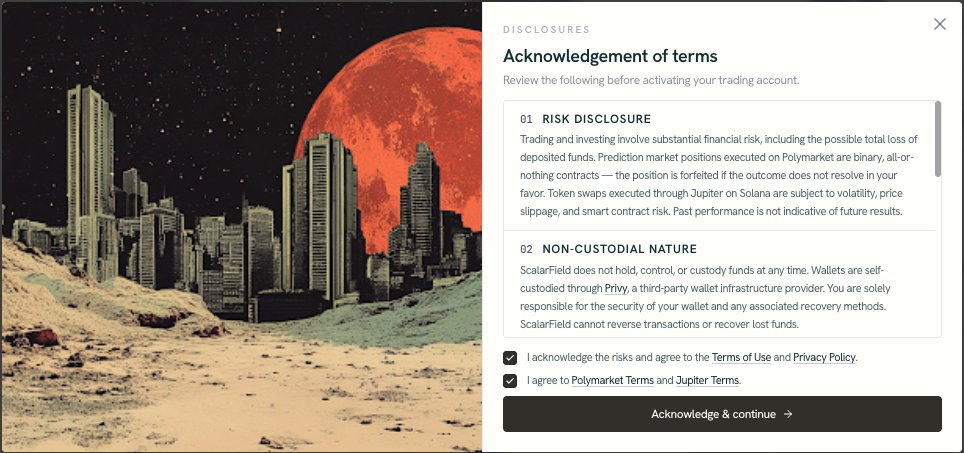
Step 4: Log In With Email
Setup starts as soon as you acknowledge, and a Privy window opens reading Log in or sign up. Enter your email.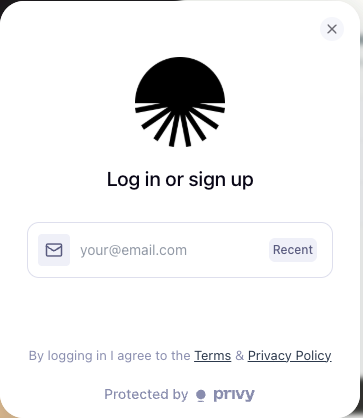 Privy emails a six-digit code and asks for it on the Enter confirmation code screen. Resend code is at the bottom if it does not arrive.
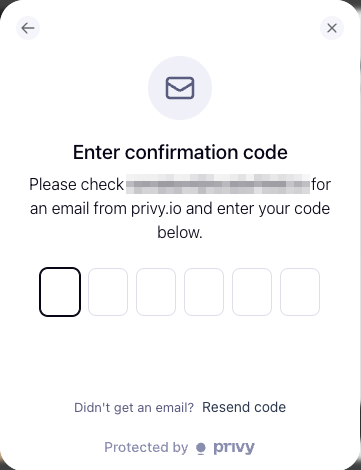 There is no password and no seed phrase. Access to the email is access to the wallet, so treat that inbox as the security boundary for whatever you fund.
If you close the Privy window by accident, the panel behind it reads Create trading access with a Continue with Email button to restart.
There is no password and no seed phrase. Access to the email is access to the wallet, so treat that inbox as the security boundary for whatever you fund.
If you close the Privy window by accident, the panel behind it reads Create trading access with a Continue with Email button to restart.
Step 5: Watch the Wallet Get Built
The panel becomes Opening wallet mandate — “Your custody wallet, signers, and venue permissions are being configured” — with an Execution Queue progress bar.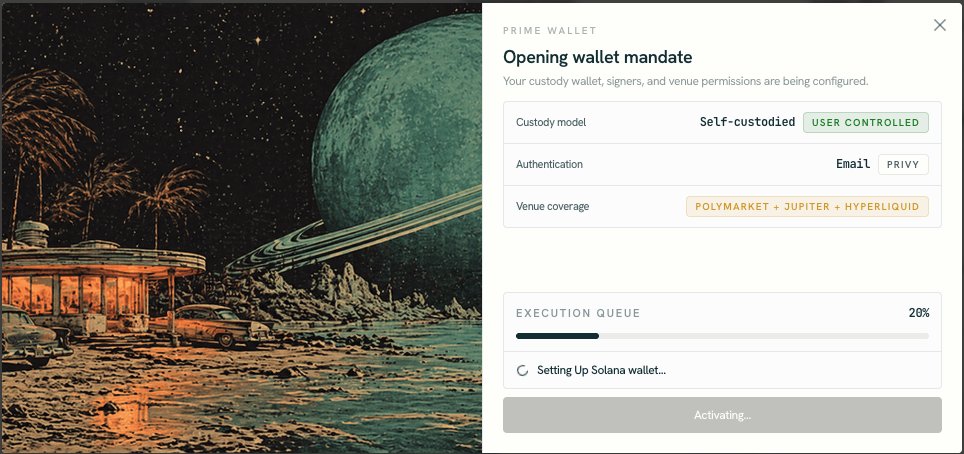 The rows above the bar confirm the arrangement: custody Self-custodied and User controlled, authentication Email via Privy, and venue coverage Polymarket + Jupiter + Hyperliquid.
Partway through it switches to Activating venues — “We are provisioning trading credentials, approvals, and venue routing” — and both addresses appear, Polygon custody and Solana custody.
The rows above the bar confirm the arrangement: custody Self-custodied and User controlled, authentication Email via Privy, and venue coverage Polymarket + Jupiter + Hyperliquid.
Partway through it switches to Activating venues — “We are provisioning trading credentials, approvals, and venue routing” — and both addresses appear, Polygon custody and Solana custody.
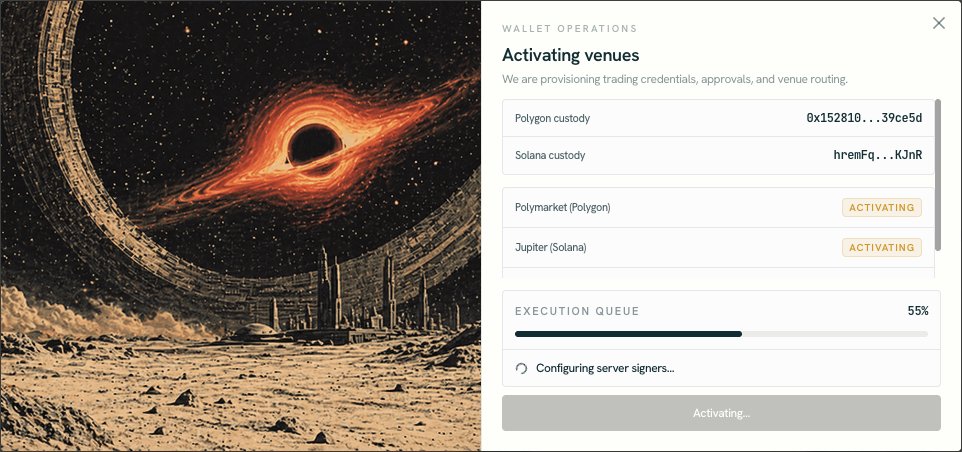 Two steps in that queue are the Jupiter ones. Setting Up Solana wallet… creates the wallet that will hold your USDC and positions. Configuring server signers… registers a Scalar Field trading key on it — the thing that lets an agent sign a swap while you are asleep. The platform is direct about the boundary: the key can trade but never withdraw.
Closing the modal is safe. A banner reads “Setting up your wallet…” with the note “You can close this and setup will continue in the background.”
Two steps in that queue are the Jupiter ones. Setting Up Solana wallet… creates the wallet that will hold your USDC and positions. Configuring server signers… registers a Scalar Field trading key on it — the thing that lets an agent sign a swap while you are asleep. The platform is direct about the boundary: the key can trade but never withdraw.
Closing the modal is safe. A banner reads “Setting up your wallet…” with the note “You can close this and setup will continue in the background.”
Step 6: Confirm the Wallet Is Live
When the queue finishes, the panel reads Execution wallet live — “Your self-custodied wallet is ready for market access.”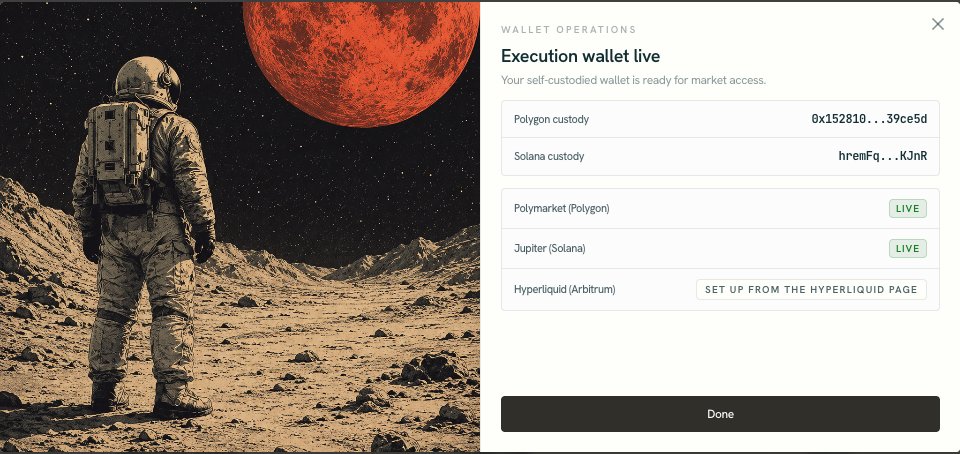 Check that Jupiter (Solana) reads Live. Hyperliquid (Arbitrum) reads Set up from the Hyperliquid page, which is expected — it shares the wallet but has its own setup.
Click Done.
Check that Jupiter (Solana) reads Live. Hyperliquid (Arbitrum) reads Set up from the Hyperliquid page, which is expected — it shares the wallet but has its own setup.
Click Done.
Step 7: Verify Your Jupiter Account
Jupiter now appears under Your Venues with a DEX badge.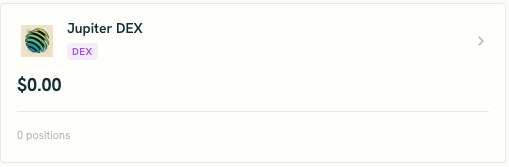 Click it, or go to
 scalarfield.io/portfolio/jupiter.
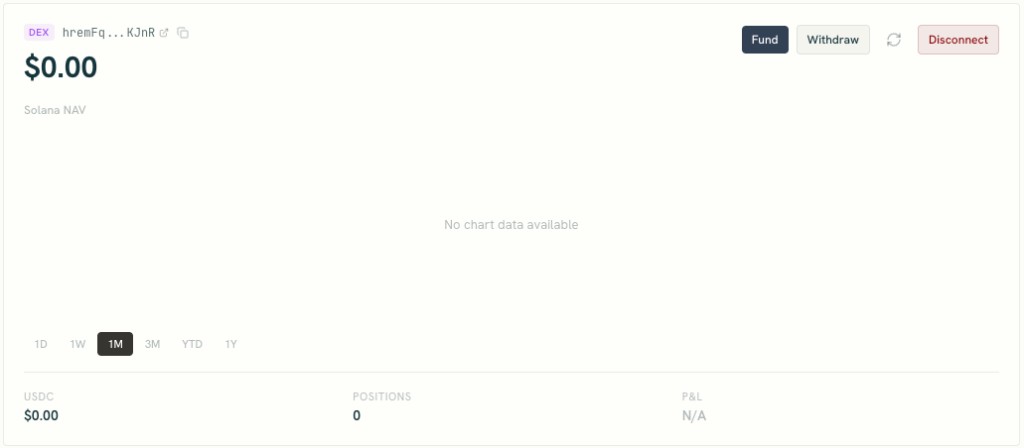 The header shows your Solana address, which you can copy or open on Solscan through the external-link icon, plus Fund, Withdraw, refresh, and Disconnect. Below sits your portfolio value labelled Solana NAV — the wallet’s net asset value, USDC plus positions — an empty chart with
 1D, 1W, 1M, 3M, YTD, and 1Y ranges, and three tiles: USDC, Positions, and P&L.
Everything reads zero and P&L reads N/A, which is correct for a wallet with no money in it. Further down the page you also get:
- Quick links to Solscan for on-chain activity and to your Jupiter Portfolio for transactions
- Buy Token, a manual swap panel with token search, quantity, and a slippage field in basis points
- Positions, with symbol, quantity, average cost, current price, market value, P&L, the strategy that opened it, and a per-row Sell
- Trade History, with time, symbol, side, quantity, price, amount, fee, transaction link, and strategy
If Jupiter Did Not Activate
Two partial states are common enough to be worth naming, and neither requires starting over. You have a wallet but no Solana address. This happens if you connected Polymarket earlier and the Solana step was skipped. Clicking Set Up Wallet opens a panel headed Add Solana execution — “Polygon custody is live. Add Solana routing to unlock Jupiter trading.” Click Create Solana Wallet. You have a Solana wallet but Jupiter is not activated. The card reads Activate Trading, and the Jupiter page shows Set Up Jupiter Trading — “Swap Solana tokens, including tokenized stocks (xStocks), funded by USDC on Solana” — as a two-step checklist:- Fund your Solana wallet. Buy USDC with a card or send USDC on Solana, via Fund Wallet.
- Enable trading. A one-time approval of a Scalar Field trading key for your Solana wallet, described as: “Funds stay in your wallet; the key can trade but never withdraw.” Click Enable Trading; it takes about ten seconds.
Step 8: Fund the Wallet
Click Fund. The Fund Your Wallet modal, headed “Add USDC to your Solana wallet,” offers two routes.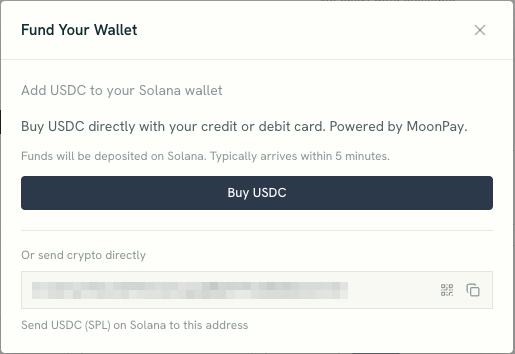 Buy with a card. Buy USDC opens MoonPay: “Buy USDC directly with your credit or debit card.” Funds are deposited on Solana and typically arrive within five minutes.
Send crypto directly. Under “Or send crypto directly” is your address, with a QR code and copy button, captioned “Send USDC (SPL) on Solana to this address.”
Two things to get right, because neither is recoverable:
Buy with a card. Buy USDC opens MoonPay: “Buy USDC directly with your credit or debit card.” Funds are deposited on Solana and typically arrive within five minutes.
Send crypto directly. Under “Or send crypto directly” is your address, with a QR code and copy button, captioned “Send USDC (SPL) on Solana to this address.”
Two things to get right, because neither is recoverable:
- The network must be Solana. Withdrawing from an exchange, select Solana — not Ethereum, not Polygon.
- Send SPL USDC, the standard USDC on Solana.
How Orders Behave
Jupiter is a swap venue, not a broker, and three of its quirks will shape your strategy code.- Symbols are
J:-prefixed mint addresses, likeJ:DezXAZ8z7PnrnRJjz3wXBoRgixCa6xjnB7YaB1pPB263. Plain tickers such asBONKare rejected, because lookalike tokens share symbols on Solana. Resolve tokens withsearchJupiterTokens()orscreenJupiterTokens(). - Swaps are ExactIn. Your requested quantity is converted at the current price, so
filled_qtycan differ slightly from what you asked for. Read holdings back fromvenue.positions()rather than assuming the request was filled exactly. - Fills are synchronous. The trade call blocks until the swap confirms or fails, and the response carries
tx_hash, the Solana transaction signature. - Slippage defaults to 50 bps (0.5%), settable per trade. Widen it for thin tokens; the manual Buy Token panel exposes the same setting.
- Everything trades 24/7, including tokenized equities. There are no market hours to schedule around.
- There is no order book. Jupiter aggregates liquidity, so there is a live price but no bid, ask, or depth.
- Selling can leave dust. Treat positions under $0.10 of market value as closed.
- On-chain state lags slightly. Allow a moment for settlement before re-querying positions after a fill — the sell dialog says as much.
How to Withdraw
Click Withdraw on the Jupiter page.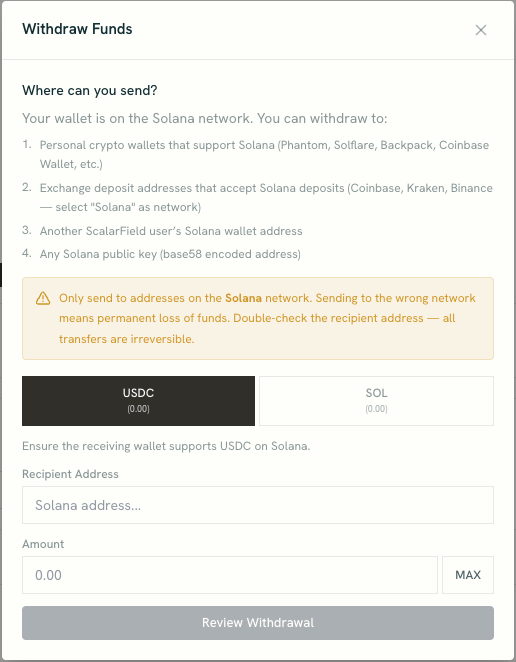 Choose USDC or SOL, paste a recipient address, and enter an amount — MAX fills in the full balance. Unlike the Polygon side, there is no withdrawal fee on Solana for either token.
Valid destinations are listed in the modal: personal wallets that support Solana (Phantom, Solflare, Backpack, Coinbase Wallet), exchange deposit addresses that accept Solana deposits (Coinbase, Kraken, Binance — selecting “Solana” as the network), another Scalar Field user’s Solana address, or any base58 Solana public key.
The warning deserves quoting in full, because self-custody offers no recourse: “Only send to addresses on the Solana network. Sending to the wrong network means permanent loss of funds. Double-check the recipient address — all transfers are irreversible.”
Review, confirm, and Withdrawal Complete confirms it was submitted to the Solana network. One practical note: MAX on SOL will empty the wallet, and an empty SOL balance leaves nothing to pay gas with, so leave a little behind if you plan to keep trading.
Choose USDC or SOL, paste a recipient address, and enter an amount — MAX fills in the full balance. Unlike the Polygon side, there is no withdrawal fee on Solana for either token.
Valid destinations are listed in the modal: personal wallets that support Solana (Phantom, Solflare, Backpack, Coinbase Wallet), exchange deposit addresses that accept Solana deposits (Coinbase, Kraken, Binance — selecting “Solana” as the network), another Scalar Field user’s Solana address, or any base58 Solana public key.
The warning deserves quoting in full, because self-custody offers no recourse: “Only send to addresses on the Solana network. Sending to the wrong network means permanent loss of funds. Double-check the recipient address — all transfers are irreversible.”
Review, confirm, and Withdrawal Complete confirms it was submitted to the Solana network. One practical note: MAX on SOL will empty the wallet, and an empty SOL balance leaves nothing to pay gas with, so leave a little behind if you plan to keep trading.
Troubleshooting
How to Disconnect
Click Disconnect on the Jupiter page.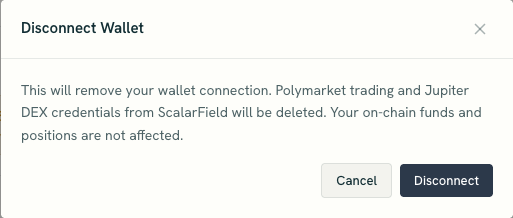 The confirmation is titled Disconnect Wallet: “This will remove your wallet connection. Polymarket trading and Jupiter DEX credentials from ScalarField will be deleted. Your on-chain funds and positions are not affected.”
Read that first sentence carefully, because it is easy to misread as Jupiter-only. Disconnecting here disconnects the whole wallet, so Polymarket goes with it. There is no way to detach Jupiter alone — it is one wallet, and this removes Scalar Field’s access to all of it.
Your money is not affected. The wallet still exists, balances and positions remain on-chain and visible on Solscan, and logging back in with the same email restores access.
If an agent currently depends on the connection, the disconnect is refused with a Cannot Disconnect notice listing the agents by name. Pause or delete them, then disconnect.
The confirmation is titled Disconnect Wallet: “This will remove your wallet connection. Polymarket trading and Jupiter DEX credentials from ScalarField will be deleted. Your on-chain funds and positions are not affected.”
Read that first sentence carefully, because it is easy to misread as Jupiter-only. Disconnecting here disconnects the whole wallet, so Polymarket goes with it. There is no way to detach Jupiter alone — it is one wallet, and this removes Scalar Field’s access to all of it.
Your money is not affected. The wallet still exists, balances and positions remain on-chain and visible on Solscan, and logging back in with the same email restores access.
If an agent currently depends on the connection, the disconnect is refused with a Cannot Disconnect notice listing the agents by name. Pause or delete them, then disconnect.
Final Checklist
Before you point an agent at the account, confirm:- Wallet: Setup finished, and Jupiter (Solana) reads Live.
- Activation: The Jupiter page shows the portfolio dashboard, not the Set Up Jupiter Trading checklist.
- Access: You know which email opens the wallet, and that it is the only credential.
- Funding: You sent SPL USDC on the Solana network, and it shows in the USDC tile.
- Gas: A small SOL balance is available for transaction fees.
- Symbols: Your strategy resolves
J:mint addresses rather than passing plain tickers. - Slippage: You have set
slippage_bpsdeliberately for the liquidity you are trading. - Live only: You understand there is no Jupiter paper mode, so first trades should be small.
- Exit: You know disconnecting removes Polymarket too, but never touches funds.